Category: Decor

  • 10 Office Wall Decor Ideas A Stylish Workspace

    A well-designed office wall plays a major role in shaping productivity, focus, and overall workspace experience. In modern Pinterest ideas for workspace design, office walls are no longer treated as empty backgrounds. They are transformed into structured visual environments that support organization, creativity, and motivation. Office wall decor combines functionality with aesthetic value, allowing professionals, students, and home office users to build a workspace that feels intentional and efficient. Through thoughtful planning, even a simple wall can become a structured area that improves workflow and visual clarity.

    This article explores practical office wall decor ideas that balance modern design, minimalist style, and functional organization. Readers will learn how to apply DIY tutorial methods, choose suitable materials, and structure wall layouts that support productivity. Each concept focuses on easy project execution, beginner friendly steps, and adaptable inspiration for different room sizes. The goal is to provide creative ideas that can be implemented in real workspaces using simple materials and clear planning approaches.

    Why This Idea Is Trending or Useful

    Office wall decor has become increasingly popular due to the rise of home offices and hybrid work environments. People now seek ways to improve their workspace without major renovations. Pinterest ideas for office design often focus on combining organization with aesthetic appeal, making walls both functional and visually structured. This approach supports productivity by reducing clutter and improving focus through intentional design.

    The trend also aligns with DIY culture, where users prefer affordable, customizable solutions. Office wall projects often use accessible materials such as wood panels, metal grids, and adhesive systems. These allow users to build creative setups without professional installation. The flexibility of these designs makes them suitable for beginners, as they can be adjusted based on space, budget ideas, and personal workflow needs. The result is a practical and modern design approach that enhances both efficiency and visual harmony.

    Materials and Preparation

    Before starting any office wall decor project, proper planning is essential. The first step involves analyzing the workspace layout and identifying the wall area that will be used. Consider lighting conditions, seating position, and daily workflow patterns. This helps determine whether the wall should focus on organization, inspiration, or a combination of both.

    Common materials include pegboards, floating shelves, corkboards, metal grids, adhesive hooks, wall panels, and framed boards. Tools may include a measuring tape, level tool, drill, screws, anchors, and mounting adhesives. For DIY setups, additional decorative materials like paint, clips, string lights, and containers can be included.

    Preparation also involves categorizing office items such as stationery, notes, calendars, and reference materials. This ensures the wall design supports actual workflow needs. Planning the layout on paper before installation helps avoid mistakes and ensures balanced spacing. A well-prepared workspace results in a more efficient, organized, and visually consistent office environment.


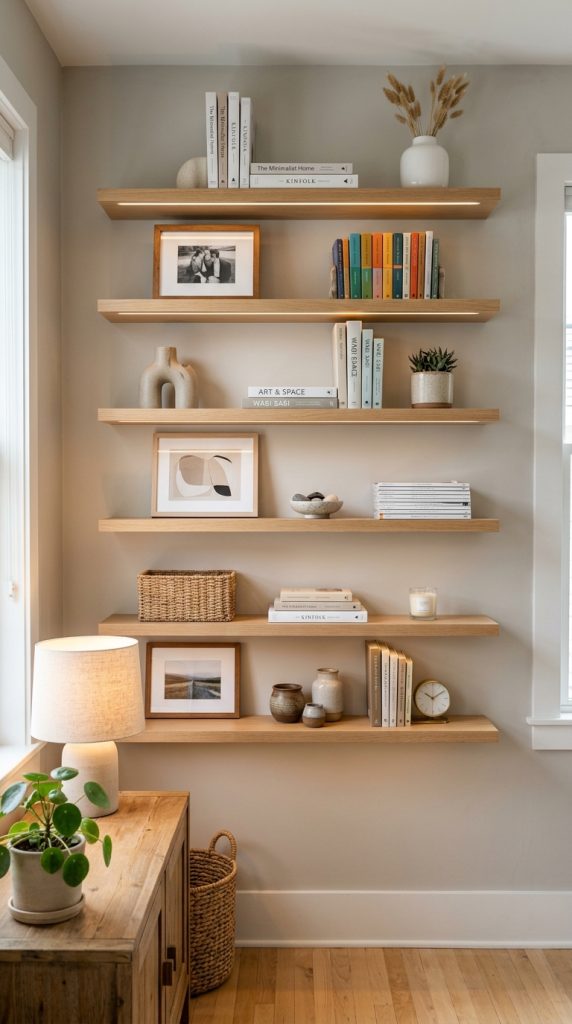
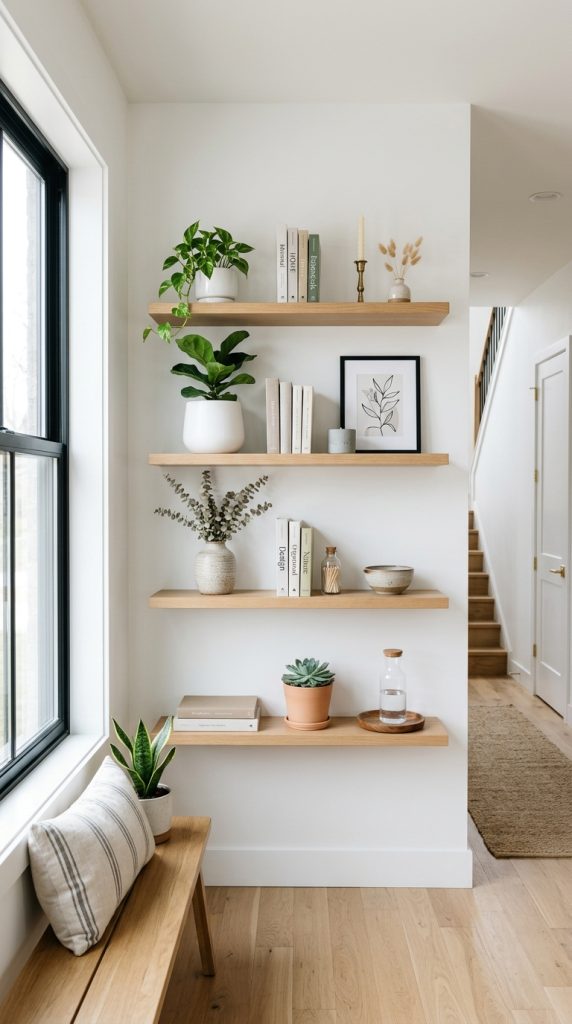
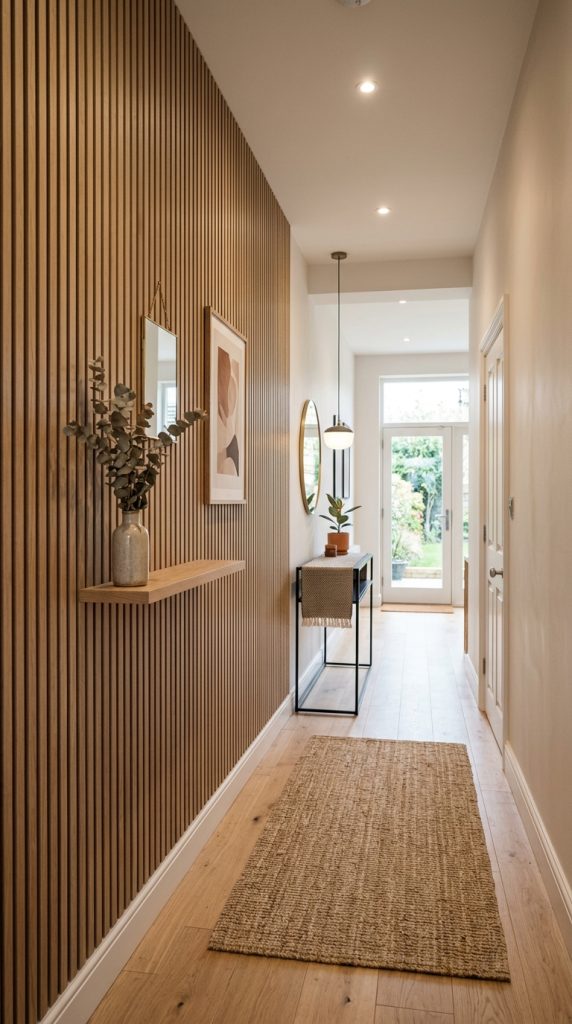
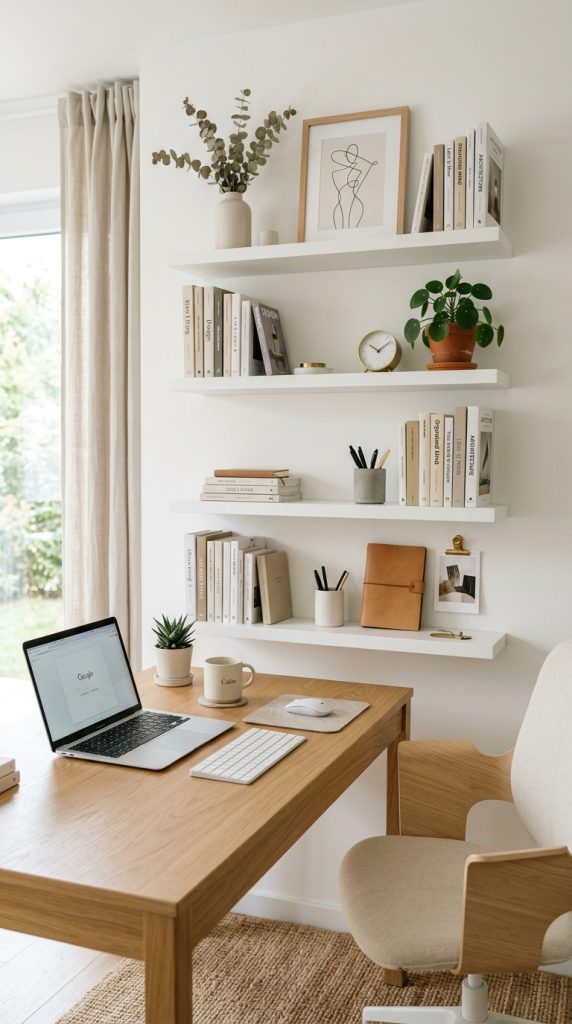
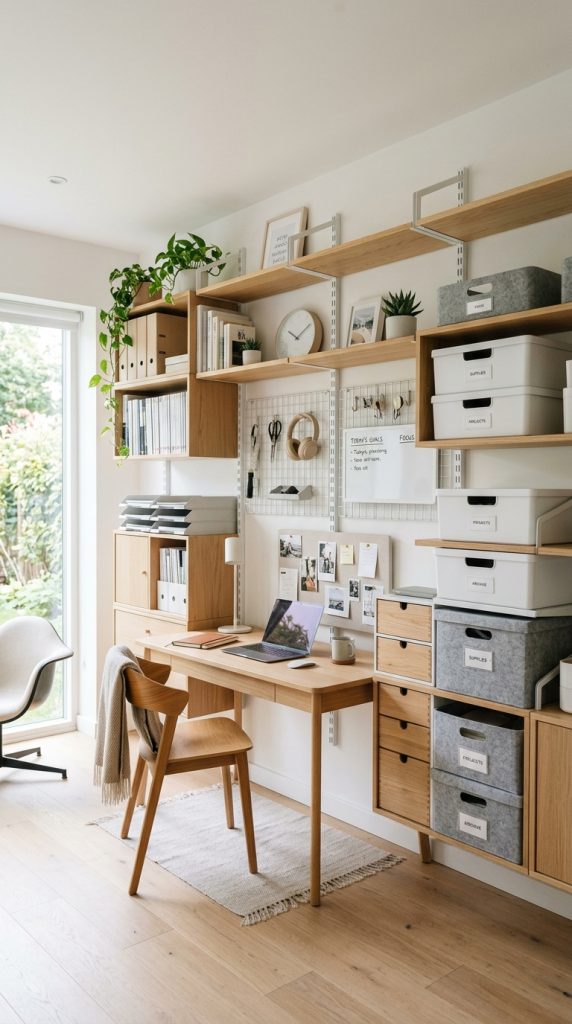
    Idea 1: Minimalist Floating Shelf Workspace Wall

    How to Create

    A minimalist floating shelf wall transforms a plain office area into a structured and organized workspace. This concept focuses on simplicity and clean lines, aligning with modern design principles. Floating shelves allow essential office items to be displayed without creating visual clutter. The arrangement supports productivity by keeping frequently used materials within reach while maintaining a clear desk surface. This idea is commonly seen in Pinterest ideas due to its balance between function and aesthetic appeal.

    The design works best when shelves are spaced evenly and aligned horizontally or asymmetrically for a modern touch. Neutral colors such as white, beige, or natural wood enhance the minimalist style. Items placed on shelves should be grouped based on function, such as books, stationery, or small storage boxes. Maintaining negative space is essential to avoid overcrowding. This approach creates a calm and structured visual environment suitable for focused work.

    Execution Process

    Installation begins with measuring wall space accurately and marking shelf positions. Anchors and brackets must be securely installed to support weight. Once shelves are mounted, arrange items starting with larger objects at the bottom or ends for balance. Use uniform containers to maintain consistency. Keep decorative elements minimal to preserve functionality. Regular adjustments help maintain organization as office needs change. This DIY tutorial approach ensures a practical and beginner friendly setup.


    Idea 2: Pegboard Organization Wall System

    How to Create

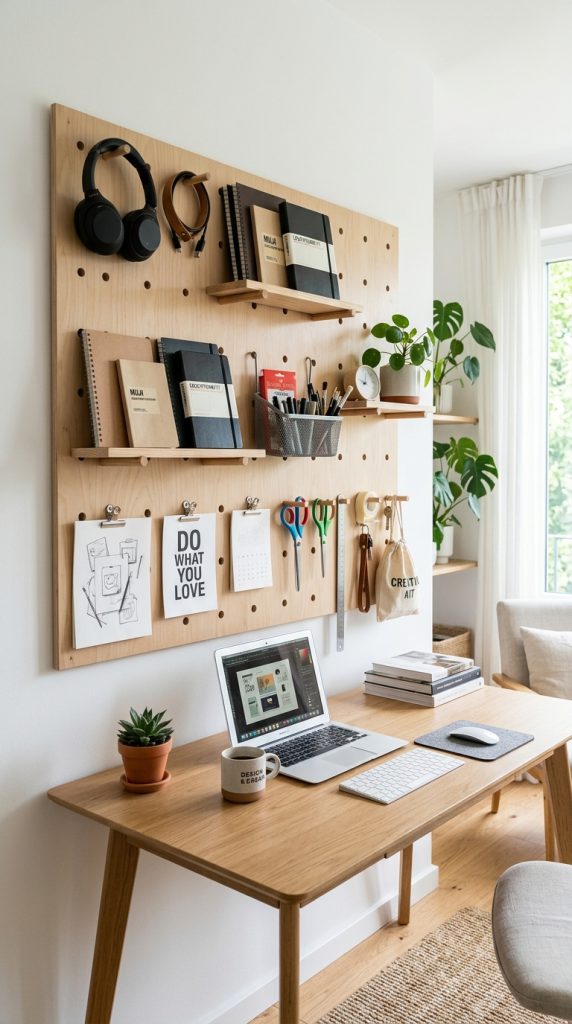
    A pegboard wall system is a highly functional office wall decor solution designed for flexible organization. Pegboards consist of perforated panels that allow hooks, shelves, and containers to be repositioned easily. This makes them ideal for dynamic workspaces where storage needs frequently change. The system supports creative ideas while maintaining a structured and modern design. It is widely used in Pinterest ideas for its adaptability and efficiency.

    Pegboards work well in small and large office spaces because they utilize vertical storage. Items such as stationery, headphones, notes, and small tools can be organized visually. The open structure allows users to see everything at a glance, reducing time spent searching for materials. This method is especially useful for creative professionals who require quick access to multiple tools throughout the day.

    Setup Method

    Installation involves mounting the pegboard securely to the wall using spacers and screws. Once installed, hooks and shelves can be arranged based on workflow needs. Group similar items together for better organization. Regular rearrangement allows customization based on tasks or projects. Adding labeled containers improves clarity. This easy project is beginner friendly and highly efficient for improving workspace organization.


    Idea 3: Corkboard Inspiration and Planning Wall

    How to Create

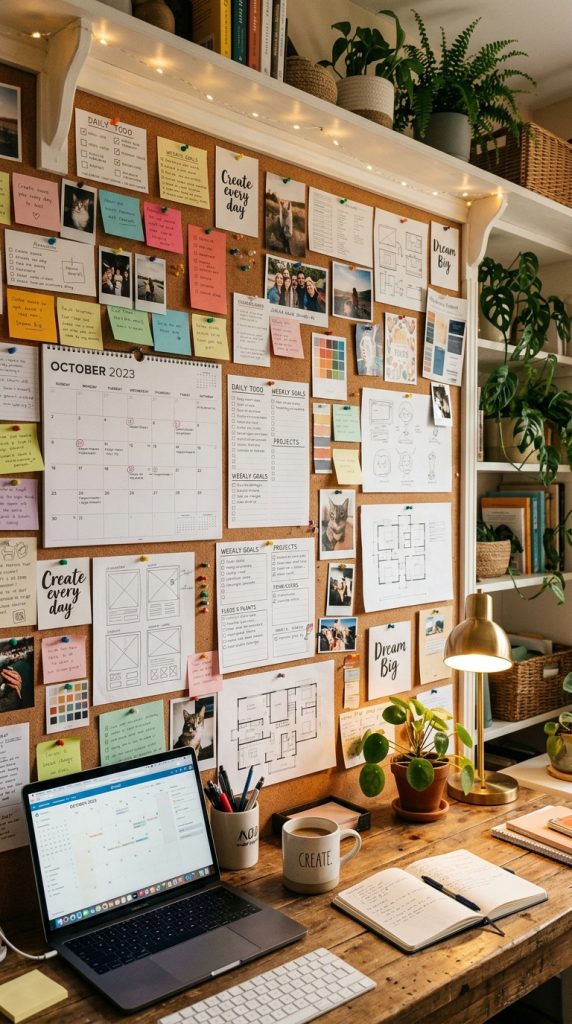
    A corkboard wall serves as both an organizational and inspirational workspace feature. It allows users to pin notes, schedules, and creative ideas in a structured format. This method is commonly used in modern office design because it supports planning and visual thinking. Corkboards help transform a plain wall into an interactive workspace tool that enhances productivity.

    The design can be expanded across a large wall or used as a single framed section. Items such as calendars, reminders, sketches, and motivational notes can be arranged freely. This flexible structure supports both structured planning and creative brainstorming. The visual nature of corkboards helps improve focus by keeping important information visible at all times.

    Step-by-Step Guide

    Installation requires mounting cork panels or a large board securely on the wall. Once installed, organize content into sections such as tasks, goals, and references. Use pins or clips to attach materials. Regular updates ensure the board remains relevant and useful. This DIY tutorial method is simple, budget friendly, and highly adaptable for any office space.


    Idea 4: Grid Wall Organizer with Hanging Storage

    How to Create

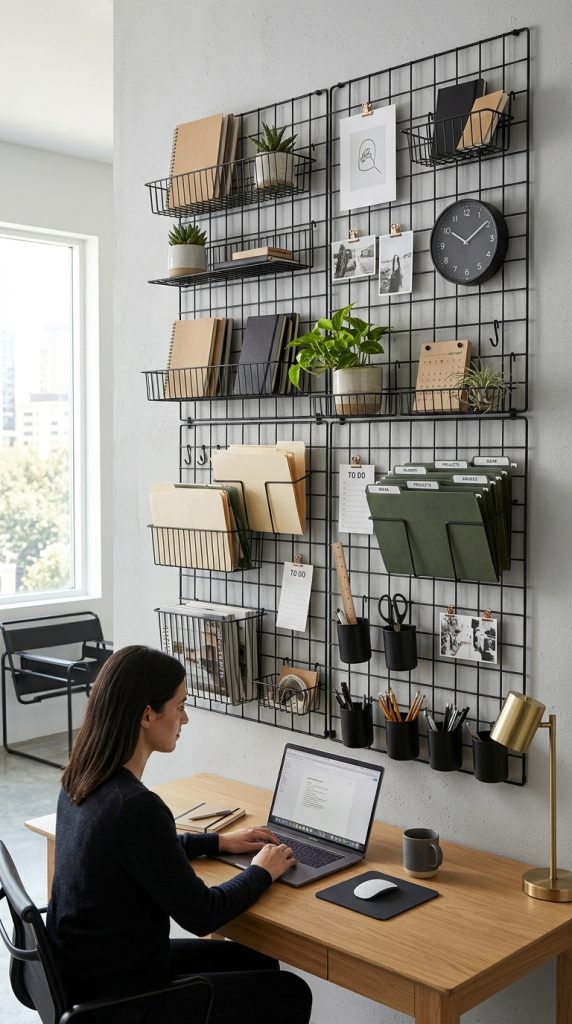
    A metal grid wall organizer provides a modern and industrial-inspired office wall decor solution. The grid structure allows multiple accessories such as baskets, hooks, and clips to be attached. This creates a flexible system for storing office supplies while maintaining a clean aesthetic. It is widely used in Pinterest ideas for its combination of style and practicality.

    The open structure allows users to customize layout based on needs. Items such as documents, notebooks, and stationery can be arranged in vertical sections. The design also supports decorative elements like small plants or framed notes. This balance between functionality and aesthetic makes it suitable for modern workspace environments.

    Execution Process

    Install the grid panel securely using wall anchors. Attach accessories such as baskets and hooks based on planned layout. Arrange items by frequency of use for better efficiency. Keep heavier items at lower positions for stability. Regular adjustments help maintain organization. This easy project provides a flexible and scalable workspace solution.


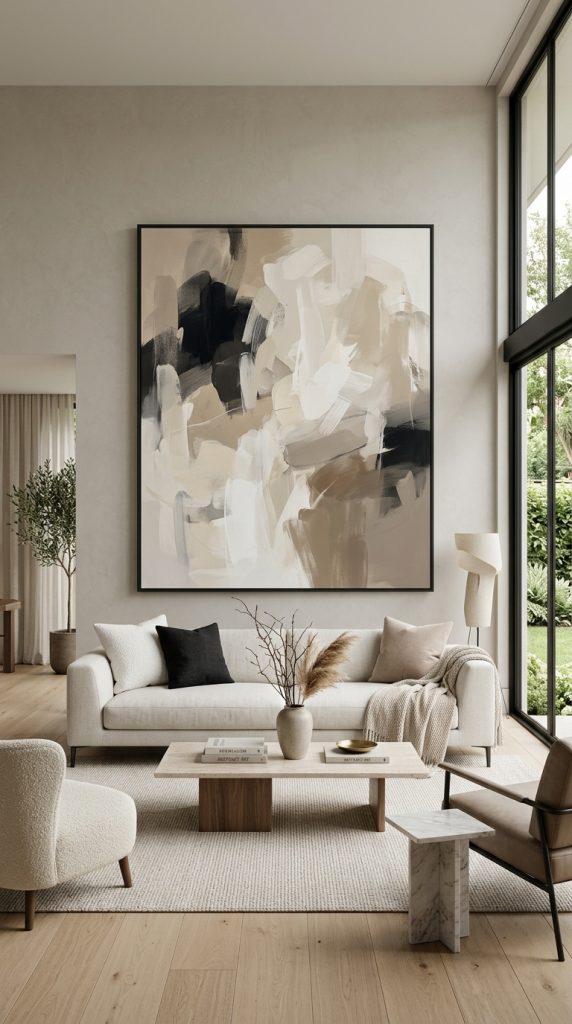
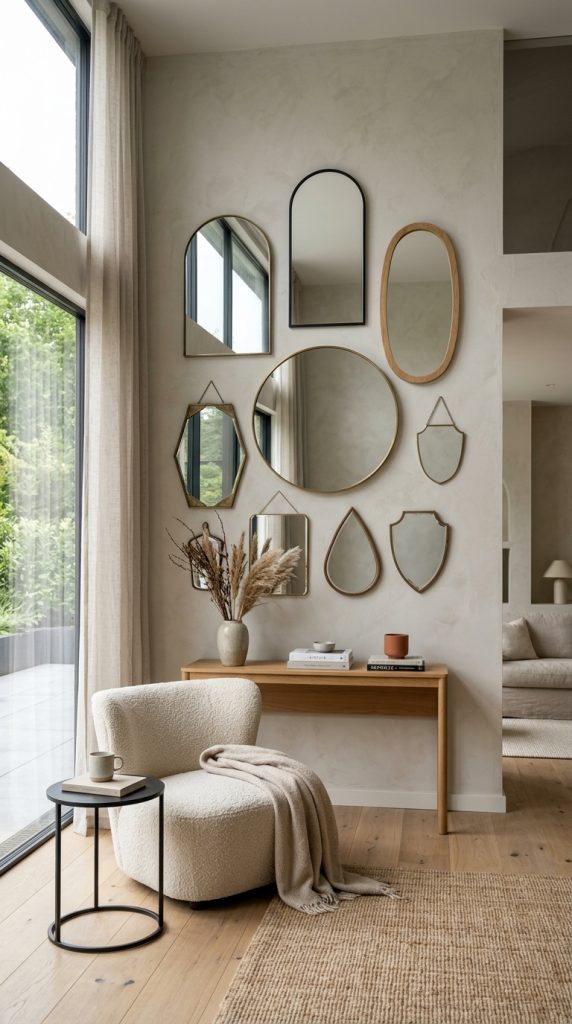
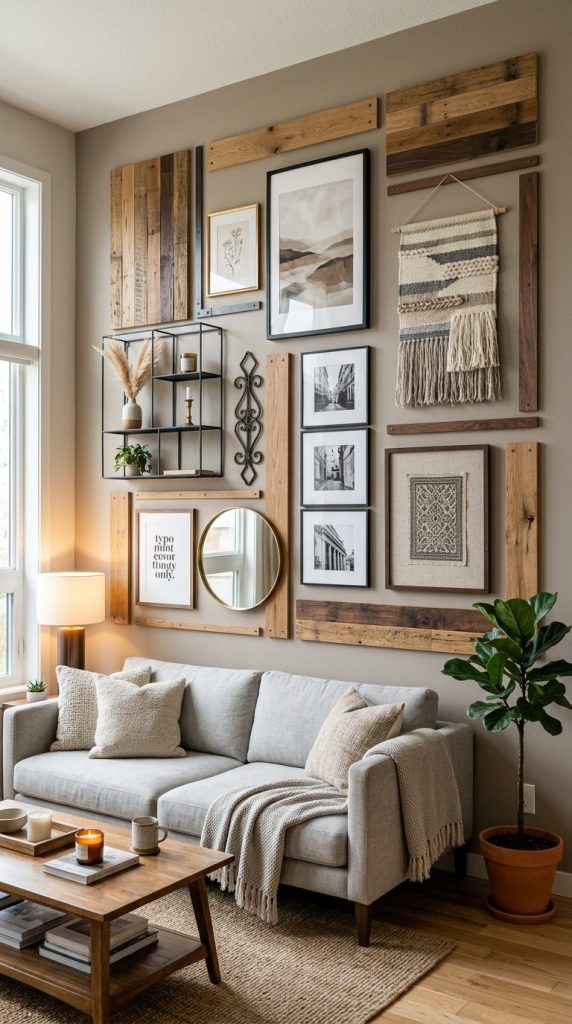
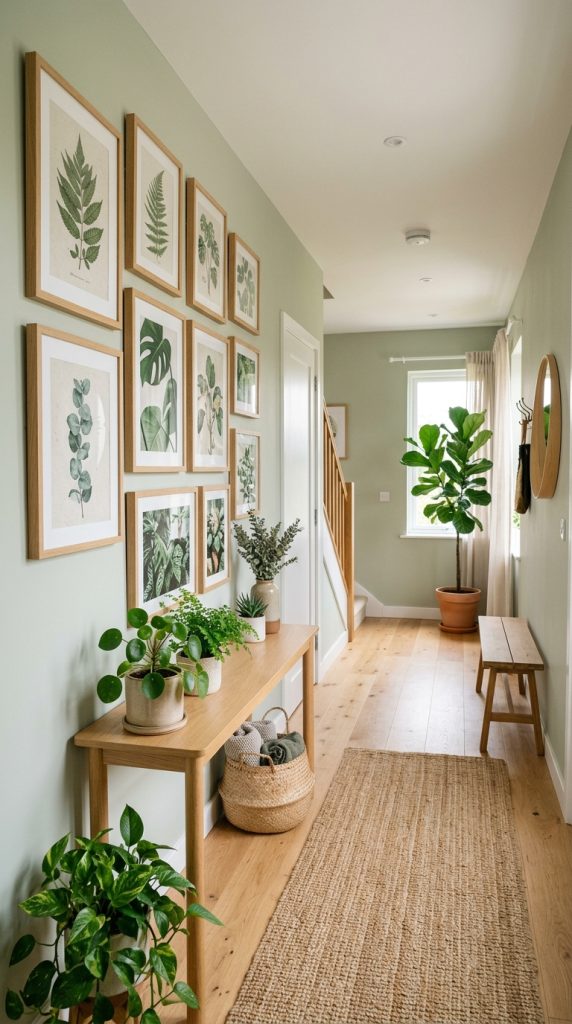
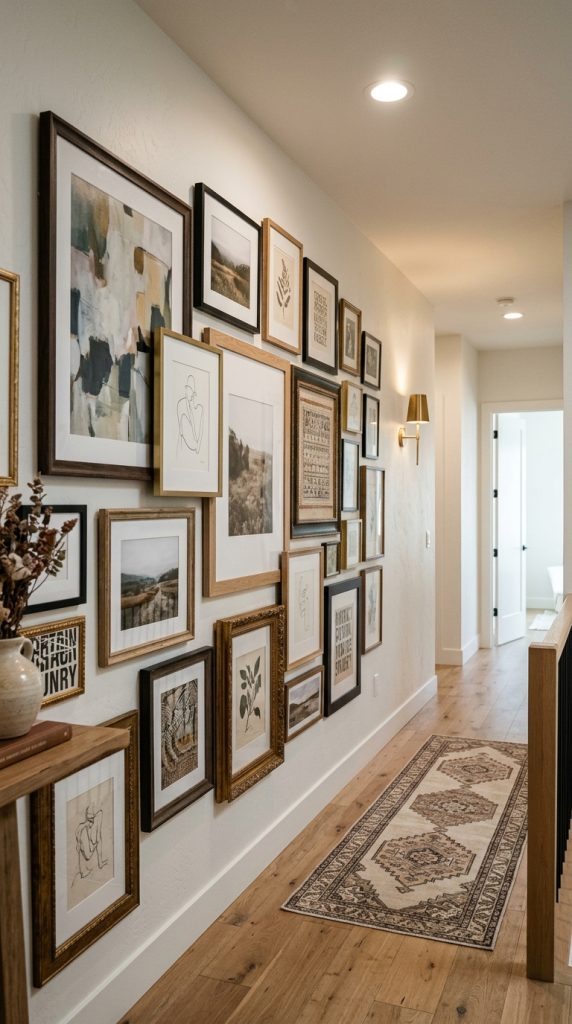
    Idea 5: Framed Office Gallery Wall

    How to Create

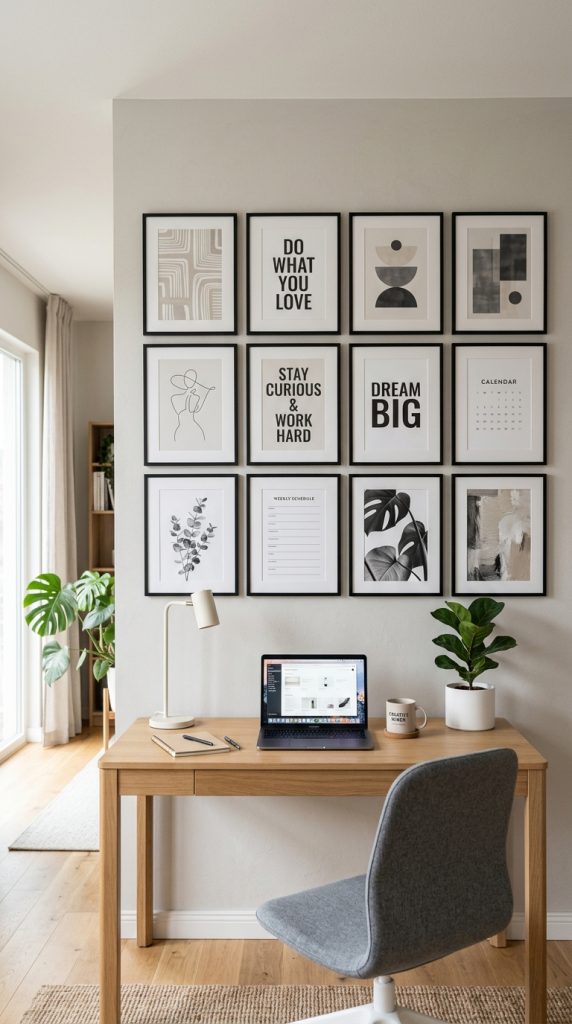
    A framed gallery wall brings structure and visual harmony to office spaces. It combines decorative frames with functional content such as schedules, quotes, and diagrams. This design adds personality while maintaining a professional appearance. It is commonly featured in Pinterest ideas for modern home office inspiration.

    Frames can be arranged in symmetrical or asymmetrical layouts depending on preference. Neutral frame colors enhance minimalist style, while mixed textures create visual depth. Content inside frames should support productivity or motivation. This includes planning sheets, abstract designs, or structured layouts.

    Setup Method

    Begin by planning frame placement on the floor before installation. Use consistent spacing for a balanced appearance. Secure frames using appropriate wall hooks or adhesives. Ensure alignment using a level tool. Update framed content periodically to keep the workspace dynamic and relevant.


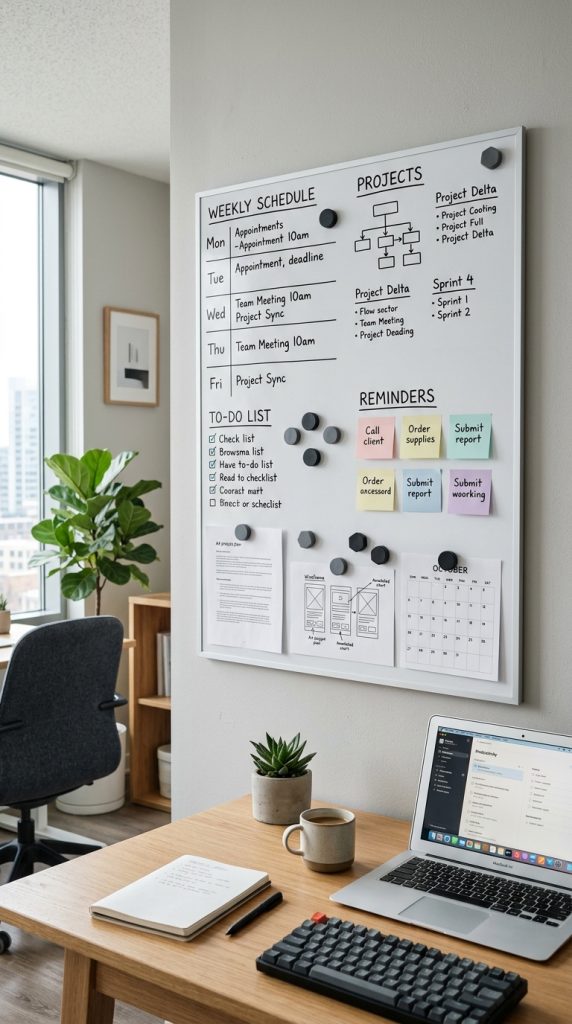
    Idea 6: Magnetic Wall Board System

    How to Create

    A magnetic wall board system offers a clean and highly functional workspace solution. It allows documents and notes to be attached using magnets, eliminating clutter from desks. This modern design supports efficient organization and quick access to important information.

    The board can be installed as a single large panel or multiple sections. Its smooth surface enhances minimalist style while maintaining functionality. It is especially useful for scheduling, task tracking, and project planning.

    Step-by-Step Guide

    Install the magnetic board securely on the wall. Use labeled magnets to categorize information. Organize content into daily, weekly, and long-term sections. Regular updates ensure clarity and efficiency. This beginner friendly project improves workflow organization significantly.


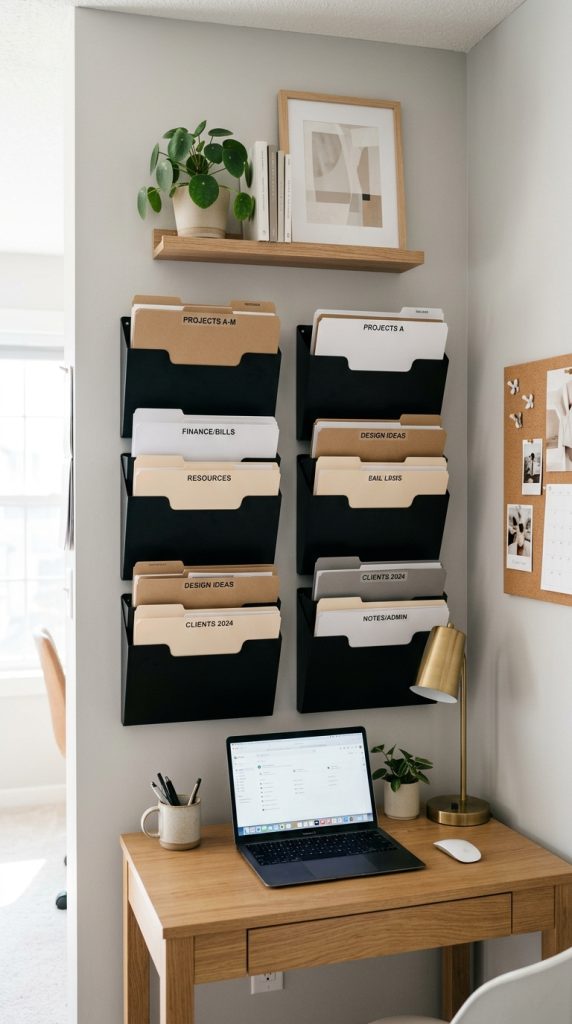
    Idea 7: Vertical File Storage Wall

    How to Create

    Vertical file storage uses wall-mounted compartments to organize documents efficiently. This system reduces desk clutter while keeping files accessible. It is ideal for structured office environments.

    Files can be arranged by category, priority, or project type. The vertical layout maximizes space usage and improves organization clarity.

    Execution Process

    Mount file holders securely on the wall. Label each section clearly. Organize documents systematically. Maintain regular filing habits to prevent clutter buildup.


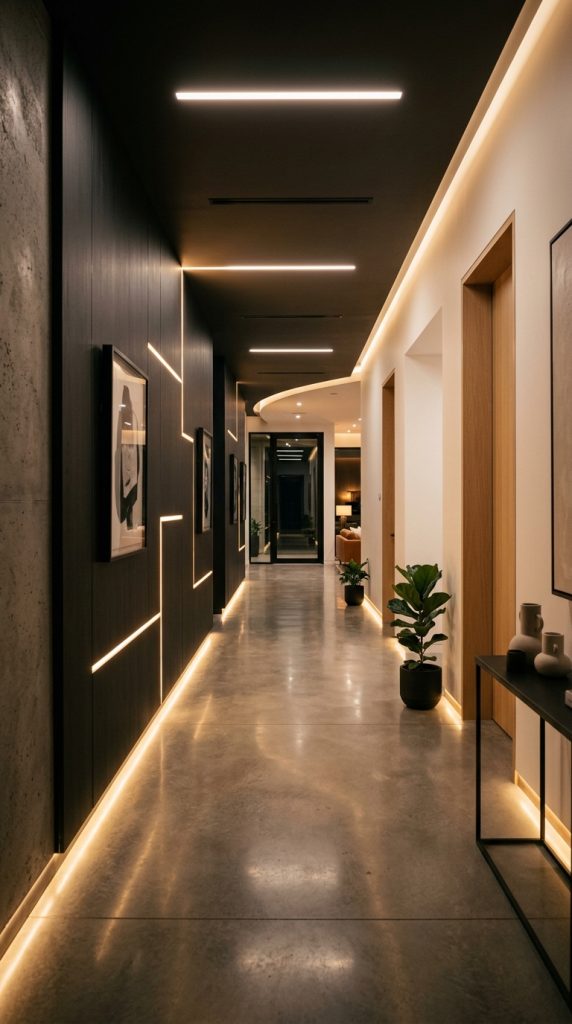
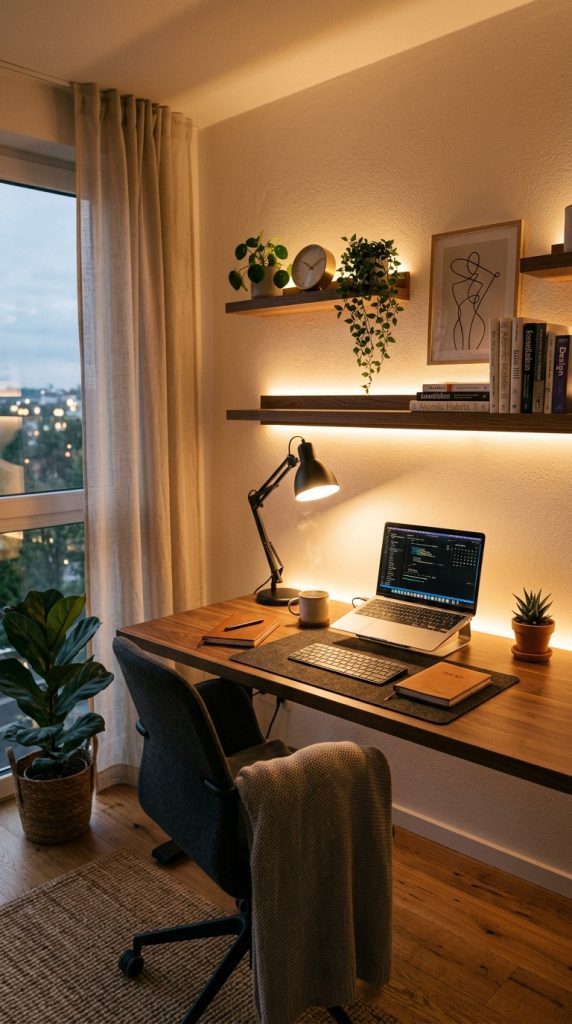
    Idea 8: Decorative Wall Lighting and Workspace Glow

    How to Create

    Lighting plays a major role in office wall decor. Decorative wall lighting enhances mood and improves visibility. This concept integrates lighting with design elements for a modern workspace.

    Soft lighting creates a balanced atmosphere suitable for long work sessions.

    Setup Method

    Install wall-mounted lighting fixtures strategically. Position them to reduce glare. Combine with neutral wall decor for consistency.


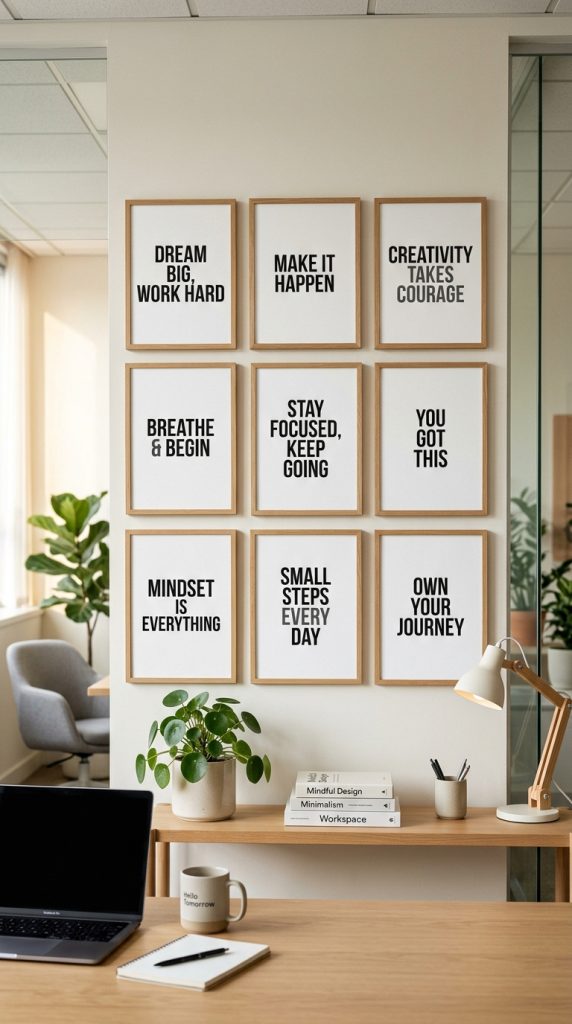
    Idea 9: Inspirational Quote Wall Panel

    How to Create

    An inspirational wall panel uses typography and design to create motivation in the workspace. It adds personality while maintaining simplicity.

    Quotes can be arranged in structured layouts for visual balance.

    Step-by-Step Guide

    Print or design quote panels and mount them evenly. Maintain consistent spacing for clarity.


    Idea 10: Modular Office Wall Storage Units

    How to Create

    Modular storage units provide customizable wall organization. Sections can be rearranged based on needs.

    This flexible system supports long-term workspace evolution.

    Execution Process

    Install modular panels securely. Customize compartments. Adjust layout as workflow changes.


    Common Beginner Mistakes and How to Avoid Them

    A common mistake is overloading wall space with too many elements. This reduces functionality and creates visual clutter. Proper spacing is essential for maintaining balance. Another issue is ignoring workflow needs when planning layouts, which leads to inefficient organization. Accurate measurement and planning prevent installation errors.

    Practical Tips for Better Results

    Effective office wall decor requires consistency in layout and color usage. Neutral tones support modern design and reduce distraction. Combining storage and decorative elements improves both function and aesthetics. Regular updates ensure long-term usability and organization.

    Styling, Presentation, or Organization Ideas

    A balanced office wall combines open storage with decorative elements. Structured alignment creates a professional appearance. Mixing textures such as wood, metal, and fabric adds depth. Maintaining symmetry improves visual harmony.

    Budget or Time Planning

    Most office wall projects can be completed within a weekend. Simple DIY setups require minimal materials and planning. More complex systems may require additional time for installation. Budget-friendly options include repurposing existing storage items.

    Creative Expansion and Advanced Inspiration

    Advanced office wall designs may include integrated smart storage systems, digital boards, or hybrid workspace setups. Expanding layouts gradually allows better control over design and budget. Creative combinations of storage and decor enhance both productivity and aesthetic appeal.

  • 10 Large Wall Decor Ideas

    Large wall decor plays a central role in defining the visual identity of any interior space. Empty or plain walls often make rooms feel incomplete, while well-planned wall decoration creates structure, depth, and personality. In modern Pinterest ideas, large wall styling is no longer limited to artwork alone. It includes architectural elements, textured surfaces, layered compositions, and functional design integrations. These approaches help transform plain walls into focal points that elevate the entire room atmosphere.

    In this article, you will explore ten structured large wall decor concepts that are practical, beginner friendly, and adaptable to different home styles. Each idea explains how to build visual balance, choose materials, and apply design principles effectively. The focus is on clear methods that can be used in real homes without requiring advanced construction skills. Whether you are planning a DIY upgrade or a full home decor redesign, these ideas offer actionable inspiration that aligns with modern minimalist style and aesthetic interior planning.


    Why This Idea Is Trending or Useful

    Large wall decor has become a major focus in contemporary interior design because it offers high visual impact with relatively simple changes. Instead of renovating entire rooms, homeowners can transform atmosphere by styling one dominant surface. This makes it a practical option for budget ideas and DIY projects. Platforms like Pinterest ideas showcase how wall-focused design can define modern spaces using texture, proportion, and composition rather than expensive furnishings.

    The popularity of large wall styling also comes from its adaptability. It works across minimalist style, modern design, and even rustic interiors. It allows creative expression through materials such as wood, fabric, stone, or paint techniques. Beginners can achieve strong results with simple planning and step-by-step execution. This accessibility makes it a trending choice for home decor inspiration, especially for those seeking easy project upgrades that deliver noticeable transformation without structural renovation.


    Materials and Preparation

    Preparing for large wall decor requires careful planning to ensure visual balance and correct scale. Essential materials vary depending on the chosen concept but may include paint, wooden panels, fabric sheets, framed artwork, mirrors, adhesive mounting tools, and lighting components. These materials help create texture, structure, and depth across large surfaces. Tools such as measuring tape, level tools, marking pencils, and wall-safe installation equipment are necessary for accurate placement.

    Preparation begins with analyzing wall dimensions and identifying its function within the room. A feature wall in a living room requires a different design approach than a bedroom or hallway. It is important to select a consistent color palette that aligns with the overall interior theme. Planning also involves sketching layout ideas or creating visual references before installation. This step ensures proportional balance and avoids overcrowding. Proper preparation transforms the process into a structured DIY tutorial rather than a trial-and-error decoration method.


    MAIN IDEAS SECTION


    Idea 1: Oversized Framed Art Statement Wall

    How to Create

    Oversized framed art creates a strong focal point by occupying a large portion of the wall with a single visual element. This concept works by emphasizing scale rather than complexity, allowing one artwork to define the entire room atmosphere. It aligns with modern design principles where minimal elements are used to create maximum visual impact. The artwork can be abstract, geometric, or nature-inspired, depending on the intended aesthetic. The key is proportion, where the frame size is large enough to balance the wall without leaving excessive empty space around it. This approach is widely used in home decor because it brings structure and sophistication to both living rooms and bedrooms.

    To create this setup, begin by selecting a wall that naturally draws attention, such as behind a sofa or bed. Measure the wall carefully to determine ideal artwork size. Choose a frame that complements the roomโ€™s color palette and maintain consistency with surrounding furniture tones. Installation should ensure centered alignment and proper height placement for visual comfort. Lighting can be added above or beside the frame to enhance depth and highlight texture. This step-by-step process makes it a beginner friendly DIY project that significantly upgrades interior visual balance without requiring complex installation work.


    Idea 2: Full Wall Textured Panel Design

    How to Create

    Textured wall panels transform flat surfaces into dimensional design features. This concept focuses on adding physical depth through structured materials such as wood slats, geometric panels, or layered finishes. The goal is to create a continuous surface rhythm that interacts with light and shadow. Unlike decorative items, textured panels become part of the architecture itself, making them a strong choice for modern interior styling. This approach is often used in minimalist style environments where visual interest is created through structure rather than color variation.

    To execute this design, start by selecting a panel material that fits the roomโ€™s theme. Measure the wall accurately and plan a symmetrical or repeating layout. Install panels using precise alignment tools to maintain consistency across the surface. Once installed, apply a unified finish or paint color to maintain cohesion. Lighting should be positioned to enhance texture depth, especially from angled sources. This method is highly effective for creating a professional-level aesthetic using structured DIY planning and simple materials.


    Idea 3: Vertical Garden Wall Installation

    How to Create

    A vertical garden wall introduces natural elements into interior spaces while maximizing wall usage. This design combines greenery with structured placement to create a living decorative feature. It enhances airiness and visual softness, making it suitable for living rooms, balconies, or dining areas. The arrangement of plants creates a layered organic pattern that contrasts with architectural surfaces. This concept is widely used in modern home decor because it blends nature with structured design in a visually balanced way.

    To create this installation, begin by selecting a wall with adequate natural or artificial light exposure. Install a supporting frame system that can hold plant containers securely. Choose plants with varying textures and growth patterns to create visual diversity. Arrange them in a structured layout that maintains balance across the wall. Regular maintenance such as watering and trimming is required to preserve appearance. This step-by-step process allows even beginners to create a refreshing and aesthetic feature wall using simple planning and accessible materials.


    Idea 4: Mirror Composition Feature Wall

    How to Create

    Mirror composition walls use reflective surfaces to expand visual space and increase brightness. This concept involves arranging multiple mirrors in a structured pattern rather than using a single large piece. The reflections create depth and movement, making rooms appear larger and more open. This approach works well in compact spaces where visual expansion is needed. The design can follow geometric symmetry or organic clustering depending on interior style direction.

    To implement this idea, begin by selecting mirror shapes that complement each other, such as circular, rectangular, or abstract forms. Plan the arrangement on the floor before mounting to ensure balanced spacing. Install mirrors securely using wall-safe mounting tools. Maintain consistent gaps between pieces to preserve structure. Position lighting strategically so reflections enhance brightness without glare. This method is an easy DIY project that significantly improves spatial perception and aligns with modern aesthetic interior design principles.


    Idea 5: Floating Shelf Gallery Wall

    How to Create

    A floating shelf gallery wall combines functionality with decorative display. It allows layered arrangement of objects such as books, framed images, and decorative pieces without permanent wall clutter. This concept is widely used in organization-focused home decor because it creates structured visual storytelling. The shelves act as horizontal lines that guide the eye across the wall, producing rhythm and balance. It is adaptable to minimalist and modern design styles.

    To create this setup, measure wall width and install floating shelves at evenly spaced intervals. Begin with larger items on lower shelves and gradually layer smaller decorative elements above. Maintain consistent spacing between objects to avoid visual overcrowding. Use a unified color palette for displayed items to maintain coherence. This step-by-step method allows for easy adjustments over time, making it a flexible and beginner friendly creative project.


    Idea 6: Painted Geometric Wall Patterns

    How to Create

    Geometric wall painting introduces structured visual energy using shapes such as triangles, lines, or abstract divisions. This concept transforms plain walls into dynamic surfaces without adding physical objects. It is widely used in budget ideas because it requires only paint and planning. The result is a modern and artistic aesthetic that enhances room personality while maintaining simplicity.

    To execute this design, begin by sketching geometric patterns on the wall using light guidelines. Use painterโ€™s tape to define edges and ensure clean lines. Apply contrasting or complementary colors based on the interior palette. Remove tape carefully after drying to reveal sharp shapes. This method requires precision but remains accessible as a DIY tutorial. It is an effective way to introduce creative ideas into home decor without structural changes.


    Idea 7: Fabric Wall Hanging Composition

    How to Create

    Fabric wall compositions use textiles to introduce softness and warmth into interior spaces. Large fabric panels or layered textile pieces create visual depth while reducing harshness in room acoustics. This concept is especially effective in bedrooms and relaxation spaces. The material movement and texture variation add a handcrafted aesthetic that aligns with modern design trends.

    To create this installation, select fabric types with complementary textures and colors. Mount them using concealed rods or frames to maintain smooth alignment. Arrange layers in staggered or symmetrical formats depending on design preference. Ensure fabrics are properly stretched to avoid uneven surfaces. This simple step-by-step approach allows for flexible DIY customization while maintaining an aesthetic and balanced wall composition.


    Idea 8: Accent Lighting Wall Feature

    How to Create

    Accent lighting walls use illumination as the primary design element. Instead of decorative objects, lighting patterns create visual interest and depth. This includes strip lighting, recessed fixtures, or directional lamps that highlight wall structure. The result is a dynamic atmosphere that changes throughout the day and enhances architectural features.

    To implement this design, plan lighting placement based on wall structure. Install lighting elements behind panels, along edges, or within recessed sections. Ensure even distribution to avoid harsh contrast. Test lighting angles to achieve balanced illumination. This method is highly effective for modern interior design and works well in both large and small spaces.


    Idea 9: Mixed Material Collage Wall

    How to Create

    A mixed material wall combines wood, metal, fabric, and framed elements into one cohesive composition. This concept focuses on contrast and layering rather than uniformity. The combination of different textures creates a visually rich surface that feels curated and intentional. It is commonly used in creative interior design to build personality within a space.

    To create this wall, select materials that complement each other in tone and scale. Arrange them in a structured layout before installation. Secure each element carefully to maintain alignment. Balance heavier materials with lighter ones to ensure visual stability. This step-by-step method allows for personalized DIY expression while maintaining cohesive home decor design principles.


    Idea 10: Sculptural Wall Relief Design

    How to Create

    Sculptural wall relief introduces three-dimensional forms directly into wall surfaces. This design creates depth through raised patterns or molded shapes that interact with lighting. It is a strong architectural approach often used in modern interiors to create high-impact focal areas. The effect changes throughout the day as shadows shift across surfaces.

    To implement this idea, choose a wall-safe sculptural material or pre-designed relief panels. Install them in a structured arrangement that follows a consistent rhythm. Ensure alignment is precise to maintain visual order. Lighting should be angled to enhance shadows and depth. This method requires careful planning but delivers a highly refined and artistic interior result suitable for advanced creative projects.


    Common Beginner Mistakes and How to Avoid Them

    A frequent mistake in large wall decor projects is ignoring scale, which leads to disproportionate compositions. Another issue is overloading walls with too many elements, reducing visual clarity. Poor alignment can also disrupt balance and weaken design impact. Avoiding these problems requires careful measurement, planning, and restraint. Each design element should support overall structure rather than compete for attention. Maintaining consistency in color, spacing, and material choice ensures a cohesive result.


    Practical Tips for Better Results

    Better results come from focusing on proportion and visual hierarchy. Large wall decor should always have a clear focal point supported by secondary elements. Consistent lighting enhances texture and depth across all designs. Using a unified color palette ensures harmony across different materials. Planning layouts before installation reduces errors and improves final composition quality. These methods help achieve a polished and structured interior aesthetic.


    Styling, Presentation, or Organization Ideas

    Styling large walls requires careful arrangement of elements to maintain balance. Objects should be distributed evenly while leaving intentional negative space. Layering techniques help create depth without clutter. Organization is essential for gallery walls and mixed material designs. Each component should contribute to a unified visual story. This approach ensures that wall decor enhances overall home decor rather than overwhelming it.


    Budget or Time Planning

    Large wall decor can be implemented gradually using phased planning. Simple projects like painting or shelving can be completed quickly, while paneling or sculptural designs may require longer timelines. Budget ideas focus on maximizing visual impact with minimal materials. Time should be allocated for planning, installation, and adjustments. Breaking the project into stages ensures manageable execution and consistent results.


    Creative Expansion and Advanced Inspiration

    Advanced wall decor can combine multiple techniques such as lighting integration, mixed materials, and sculptural elements. Expanding designs across multiple walls creates thematic continuity throughout the home. Custom-built installations offer further personalization and depth. Experimenting with texture layering and spatial composition enhances creative expression. These advanced approaches build upon foundational ideas to achieve highly refined interior environments.

  • 10 Hallway Wall Decor Ideas

    Hallway wall decor plays a key role in shaping the first visual impression of a home. Hallways are often narrow transitional spaces, yet they connect every major area of a house, making them important for overall interior design continuity. Well-planned hallway decoration transforms blank or overlooked walls into structured visual pathways that support both function and aesthetics. Pinterest ideas for hallway styling continue to grow because they focus on practical transformation using simple methods such as DIY wall art, organized frames, textured finishes, and minimalist styling techniques. This topic explores how hallway walls can be redesigned using creative ideas that suit modern design, minimalist style, and functional home decor approaches. Readers will learn how to structure layouts, choose materials, and apply step by step techniques for effective results. The goal is to help create hallways that feel intentional, visually balanced, and connected to the rest of the home environment. Each idea in this guide focuses on accessibility, beginner friendly methods, and realistic creative projects that can be completed with basic tools and planning. The result is a hallway that feels designed rather than neglected, improving both flow and atmosphere in everyday living spaces.

    Why This Idea Is Trending or Useful

    Hallway wall decoration has become increasingly popular in Pinterest ideas because homeowners now focus on maximizing every part of interior space. Hallways were previously considered purely functional, but modern design approaches emphasize their potential as aesthetic transition zones. This shift is driven by the rise of DIY home improvement culture, where simple creative projects can significantly improve interior quality without large renovations. Hallway walls are especially suitable for beginner friendly projects because they are linear, predictable, and easy to structure visually. They also allow flexible experimentation with home decor elements such as framed art, lighting accents, shelves, and textured finishes. The popularity of minimalist style has further increased interest in hallway design because it encourages clean, organized layouts that reduce visual clutter. Budget ideas also play a strong role since hallway transformations often require minimal materials compared to larger rooms. Additionally, hallway decor supports organization by incorporating functional elements such as hooks, storage panels, or display systems. This combination of practicality, accessibility, and visual improvement makes hallway wall decor a trending topic among creative projects focused on modern interior inspiration.

    Materials and Preparation

    Proper preparation is essential for successful hallway wall decor projects. Before starting, evaluate hallway dimensions, lighting conditions, and wall surface quality. Common materials include framed prints, mirrors, wall paint, wallpaper panels, wooden slats, adhesive hooks, shelves, decorative panels, and lighting fixtures. Tools typically include measuring tape, level tool, pencil, hammer, screwdriver, wall-safe adhesive, and cleaning cloth. Begin by cleaning the walls to remove dust and surface residue, ensuring better adhesion for decorative elements. Repair any cracks or uneven areas before installation. Planning the layout is a critical step because hallway walls require balanced spacing to avoid overcrowding in narrow areas. Mark reference points on the wall using light pencil guides to maintain alignment. Consider how natural and artificial lighting will affect visibility and tone throughout the hallway. Selecting a consistent color palette ensures visual flow from one end of the hallway to the other. Arranging materials on the floor before installation helps visualize spacing and composition. This preparation stage ensures that the final result is structured, visually appealing, and aligned with the overall home decor theme.

    Idea 1: Linear Gallery Wall Arrangement

    How to Create

    A linear gallery wall is one of the most effective hallway wall decor ideas because it uses the natural shape of the space. This design involves arranging framed artwork, photographs, or illustrations in a straight horizontal or vertical sequence. The structure creates visual continuity and guides movement through the hallway. Unlike random arrangements, a linear layout supports minimalist style by maintaining order and balance. It works well with black, white, or wooden frames and can adapt to both modern design and classic interiors. The key advantage of this concept is its ability to transform a narrow space into a structured visual journey. Each frame contributes to a larger composition that feels intentional rather than decorative clutter. Pinterest ideas frequently highlight gallery walls because they allow personalization while maintaining consistency. The hallway becomes a curated display area that reflects personality and design awareness without overwhelming the environment.

    Start by measuring the wall height and length accurately. Select frames that share a consistent visual theme or color palette. Mark alignment points using a level tool to ensure straight placement. Begin installation from one central reference point and extend outward evenly. Maintain equal spacing between frames to preserve rhythm and structure. Use lightweight wall-safe mounting tools for stability. After installation, adjust lighting if necessary to enhance visibility. The final result creates a balanced and organized hallway display that improves spatial flow and adds decorative clarity.

    Idea 2: Minimalist Floating Shelf Display

    How to Create

    Floating shelves introduce both decoration and functionality into hallway spaces. This idea focuses on installing slim wall-mounted shelves that hold decorative objects such as small plants, books, candles, or framed mini-artworks. The minimalist approach ensures that the hallway remains uncluttered while still gaining visual depth. Floating shelves work particularly well in modern design interiors where simplicity and structure are prioritized. They add dimension to otherwise flat walls and can be adjusted to different heights for visual variation. This concept is popular in DIY home decor because it requires minimal materials while offering flexible styling options. The shelves act as both storage and display surfaces, making them practical for organization as well. Pinterest inspiration often features this style due to its clean appearance and adaptability to different home sizes.

    Measure wall sections carefully before installation to ensure proper spacing. Install brackets or hidden mounting systems securely according to wall type. Place larger objects first to establish balance, followed by smaller decorative elements. Avoid overcrowding shelves to maintain visual clarity. Use consistent materials such as wood or neutral finishes for cohesion. Periodically rearrange items to refresh the display and maintain visual interest. This step by step method creates a functional hallway feature that combines organization and aesthetic appeal.

    Idea 3: Vertical Mirror Panel Layout

    How to Create

    Vertical mirror layouts enhance hallway brightness and create the illusion of a larger space. This design uses multiple mirrors arranged in a structured vertical formation to reflect light and expand visual depth. Mirrors are highly effective in narrow hallways because they reduce the feeling of confinement while adding elegance. The reflective surfaces contribute to a modern aesthetic and support minimalist design principles. Frames can be uniform or varied depending on the desired visual effect. This idea is widely used in interior inspiration because it combines functionality with decorative value. Mirrors also help distribute natural and artificial light more effectively throughout the space.

    Begin by selecting wall sections with good lighting exposure. Arrange mirror placements on the floor before installation to test spacing. Use precise measurements to maintain symmetry. Install each mirror securely using appropriate wall fittings. Ensure consistent vertical alignment for a clean appearance. Avoid placing mirrors in areas where reflections may create visual distraction. After installation, adjust surrounding lighting to maximize reflective impact. The final result is a brighter, more open hallway environment with enhanced spatial perception.

    Idea 4: Textured Wall Panel Design

    How to Create

    Textured wall panels introduce depth and material variation to hallway walls. This design uses wooden slats, fabric panels, or geometric surface treatments to create a three-dimensional effect. Texture adds visual interest without relying on color changes, making it suitable for minimalist style interiors. The structured surface creates rhythm and enhances architectural detail within the hallway. This approach is commonly featured in modern design projects because it transforms plain walls into refined decorative features. It also supports a natural aesthetic when wood or neutral materials are used.

    Measure wall dimensions precisely before cutting or installing panels. Prepare the surface to ensure proper adhesion or mounting. Install panels in a consistent pattern to maintain alignment and rhythm. Use level tools to avoid uneven placement. Keep surrounding decor minimal to highlight the textured surface. The result is a sophisticated hallway feature that adds depth while maintaining simplicity and balance.

    Idea 5: Monochrome Art Strip

    How to Create

    A monochrome art strip uses black and white artwork arranged in a continuous sequence along the hallway. This concept emphasizes visual consistency and supports minimalist design principles. The absence of color variation creates a calm and structured environment. Artwork can include abstract sketches, architectural drawings, or photographic prints. The linear arrangement enhances hallway flow and creates a curated visual experience. This idea is especially effective in narrow spaces where color simplicity prevents visual overload.

    Select artwork with consistent tonal values. Print or frame each piece uniformly. Measure equal spacing between frames before installation. Use a level tool to maintain alignment. Install from one end of the hallway to the other in a controlled sequence. Maintain consistent height for visual stability. The result is a cohesive hallway display that feels organized and intentional.

    Idea 6: Accent Lighting Wall Path

    How to Create

    Accent lighting transforms hallway walls by adding illumination and atmosphere. This design incorporates wall-mounted lights or LED strips along the hallway structure. Lighting enhances visibility while creating a modern aesthetic effect. It also highlights wall textures and decorative elements. This concept is widely used in contemporary interiors because it improves both function and style.

    Plan lighting placement based on hallway length and wall features. Install fixtures at consistent intervals for balanced illumination. Conceal wiring for a clean appearance. Adjust brightness levels to suit different times of day. The result is a visually dynamic hallway with enhanced depth and modern design appeal.

    Idea 7: Botanical Frame Corridor

    How to Create

    Botanical framed decor introduces natural elements into hallway walls. This concept uses plant illustrations, pressed leaves, or botanical prints arranged in a structured layout. Nature-inspired design creates a calming atmosphere and supports aesthetic home decor trends. It works well in both modern and traditional interiors.

    Select botanical artwork with consistent themes. Frame each piece uniformly. Arrange frames in a balanced sequence along the hallway. Maintain equal spacing for rhythm. The result is a refreshing and organic hallway environment.

    Idea 8: Color Block Wall Sections

    How to Create

    Color blocking divides hallway walls into geometric painted sections. This technique adds structure and modern design appeal. It allows experimentation with tones while maintaining order. It is commonly used in DIY projects due to its simplicity and strong visual impact.

    Measure wall sections carefully. Use tape to define boundaries. Apply paint evenly within marked areas. Remove tape carefully for sharp edges. The result is a bold and structured hallway design.

    Idea 9: Hanging Hook Display System

    How to Create

    A hook-based wall system combines organization and decoration. Hooks can display accessories, bags, or decorative items while maintaining visual order. This approach is practical for small hallways.

    Install hooks evenly along the wall. Maintain spacing for balance. Use consistent materials for cohesion. The result is a functional and organized hallway system.

    Idea 10: Layered Wall Art Composition

    How to Create

    Layered wall art creates depth through overlapping frames and mixed media. This design introduces dimension and creativity into hallway decor. It works well in artistic interiors.

    Arrange larger pieces first. Layer smaller pieces strategically. Maintain balance and spacing. The result is a dynamic hallway display.

    Common Beginner Mistakes and How to Avoid Them

    Common mistakes include uneven spacing, poor lighting consideration, and overcrowding. Accurate measurement and planning prevent these issues. Maintaining consistency in style improves overall results.

    Practical Tips for Better Results

    Use templates before installation. Maintain consistent color themes. Avoid excessive decoration. Focus on balance and spacing.

    Styling, Presentation, or Organization Ideas

    Align decor with hallway flow. Use repetition for rhythm. Maintain visual simplicity. Combine functional and decorative elements.

    Budget or Time Planning

    Start with focal areas. Use budget friendly materials. Complete installation in phases. Plan tools and layout in advance.

    Creative Expansion and Advanced Inspiration

    Combine multiple ideas such as lighting and gallery walls. Add texture overlays or mixed materials. Expand layouts gradually for a refined hallway design.