
10 Moody Home Decor Ideas

Creating a dramatic interior transformation requires a deliberate shift in how color, light, and texture interact within a space. Dark home decor focuses on creating a cozy environment through deep color palettes, rich textiles, and strategic accent lighting. This comprehensive DIY tutorial provides the necessary guidance to master the aesthetic without making rooms feel small or overly dark. Readers will learn how to balance deep charcoal, navy, and forest green tones with contrasting textures and functional lighting arrangements. This style provides an excellent design alternative to bright minimalism, offering a practical way to add character, warmth, and depth to any room in the house. Implementing these trending ideas allows homeowners to craft intimate, sophisticated living spaces that remain highly functional for daily activities. By understanding the principles of spatial balance and light reflection, beginners can confidently execute this design approach. The following step-by-step instructions outline accessible methods to transform ordinary rooms into elegant environments using structured planning, specific materials, and accessible creative ideas.
Why This Idea Is Trending or Useful
The surge in popularity of dark interior styling on social platforms stems from a collective desire for comforting, personal spaces. This modern design approach departs from cold, clinical aesthetics to favor rooms that evoke a sense of security and calm. The practical value of this style lies in its ability to conceal structural imperfections while creating clear focal points within a room. This aesthetic holds significant DIY appeal because substantial visual changes can be achieved through straightforward projects like paint, textile styling, and curated lighting setups. Beginners can easily participate because the style does not demand complex architectural renovations; instead, it relies on the thoughtful application of deep colors and rich layers. Using dark color schemes enhances the visual value of standard furniture pieces, making budget ideas look sophisticated and high-end. This design strategy serves as an effective tool for organizing spaces visually, using deep backdrops to highlight personal artwork, books, and handmade decorations.
Materials and Preparation
Thorough planning and careful selection of materials form the foundation of a successful interior transformation. Before applying any dark pigments or installing heavy textiles, creators must assess the natural light patterns and dimensions of the target room. Essential materials for these projects include premium matte or eggshell finish paints in deep tones, dark wood stains, heavy-weight fabrics like velvet or linen, and a variety of low-wattage warm LED light bulbs. The necessary toolkit consists of standard painting equipment such as high-quality rollers, painter’s tape, drop cloths, and precision brushes, alongside basic hardware tools for mounting fixtures. Preparation steps require clearing the workspace, repairing any drywall imperfections, and applying a high-quality primer to ensure uniform paint adherence. Planning considerations must include a detailed assessment of existing electrical outlets to ensure that new ambient lighting sources can be placed strategically throughout the room without creating visible cord clutter.
Idea 1: The Matte Charcoal Feature Wall
How to Create
A matte charcoal feature wall introduces immediate depth and architectural interest into a living space or bedroom without overwhelming the entire perimeter. The concept relies on using a non-reflective, ultra-matte finish paint in a rich charcoal or soft black hue to establish a singular focal point. This deep backdrop absorbs light uniquely, causing the boundaries of the room to visually recede and creating the illusion of expanded space. The matte texture is critical here, as gloss or satin finishes reflect light in a way that reveals minor wall imperfections and diminishes the intended cozy atmosphere. This design element works exceptionally well behind a bed frame, a television console, or a collection of framed artwork, serving as a high-contrast canvas that accentuates the items placed in front of it.
Step-by-Step Guide
Executing this project requires meticulous surface preparation to ensure a flawless, professional finish. Begin by removing all nails, filling any holes with spackling compound, and sanding the dry patches until they are completely flush with the wall surface. Apply high-quality painter’s tape along the ceiling line, baseboards, and adjacent walls to guarantee perfectly crisp, clean boundaries. Utilize a dark-tinted primer as the base coat; this step is essential when transitioning from a light wall color to a deep charcoal, as it reduces the number of final topcoats required. Once the primer dries, apply the matte charcoal paint using a high-density microfiber roller in consistent W-shaped motions to prevent visible roller tracks. Allow the first coat to dry for at least four hours before applying a second coat to achieve full, opaque color depth. Remove the painter’s tape while the second coat is slightly damp to prevent the dried paint film from peeling away at the edges.

Idea 2: Velvet Trim and Heavy Drapery
How to Create
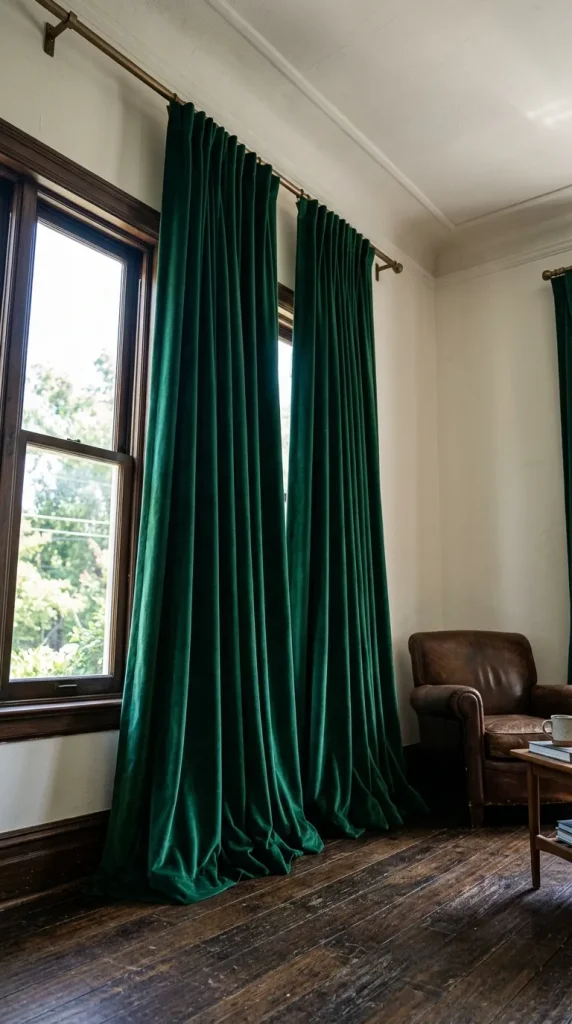
Window treatments play a defining role in controlling natural light and establishing texture within a sophisticated, enclosed interior design scheme. This concept utilizes heavy, floor-to-ceiling velvet drapery in deep jewel tones like emerald green, midnight navy, or burgundy to frame windows dramatically. The dense, pile fabric of velvet absorbs light while showcasing subtle tonal variations in its folds, which adds immediate luxury to the room. Extending the drapery from the ceiling line down to the floor elongates the perceived height of the room, counteracting any flattening effect caused by dark wall colors. This method enhances privacy and acoustic insulation while serving as a prominent decorative element that anchors the perimeter of the room.
Step-by-Step Guide
To implement this setup properly, start by measuring the distance from the ceiling, or just below the crown molding, down to the floor surface to determine the correct drapery length. Purchase panels that are approximately two inches longer than this measurement to allow the fabric to pool slightly on the floor for an elegant look. Install a heavy-duty black or matte bronze curtain rod at least six to twelve inches above the window frame, extending it six inches wider than the window on each side. This wide placement allows the curtains to be pulled back completely during the day, maximizing natural light when desired. Thread the velvet panels onto the rod, ensuring the pleats fold evenly and naturally. Use matching velvet tie-backs mounted to the wall to secure the fabric neatly, creating structured, sweeping lines that frame the window opening while maintaining clean design geometry.
Idea 3: Monochromatic Painted Molding
How to Create
The monochromatic painting technique involves coating the walls, baseboards, crown molding, and window frames in the exact same deep color and finish. This minimalist design choice eliminates the traditional high-contrast white trim, creating a seamless, unbroken perimeter that makes a room feel cohesive and encompassing. By removing visual boundaries, the eye travels smoothly across the surfaces, which visually expands the vertical dimensions of the room. This concept works exceptionally well in small spaces like entryways, powder rooms, or dens, transforming them into jewel-box environments. The technique highlights the physical texture of the architectural molding through shadow and light rather than color contrast, providing a sophisticated backdrop for furniture.
Step-by-Step Guide
Select a signature dark hue, such as deep forest green, dark plum, or slate gray, in an eggshell or satin finish that is durable enough for both walls and woodwork. Begin by thoroughly cleaning the baseboards, door casings, and crown molding with a degreasing cleaner to remove dust and oils. Sand all wooden trim surfaces lightly with fine-grit sandpaper to roughen the existing gloss finish, which ensures proper adhesion of the new paint. Apply painter’s tape along the flooring edge and any ceiling boundaries that will not be painted. Use a high-quality angled sash brush to carefully paint the intricate grooves of the molding first, ensuring the paint does not pool in the recessed areas. While the trim paint is wet, transition to a roller to coat the large flat wall sections, blending the edges seamlessly. Apply two full coats across all surfaces, observing the manufacturer’s recommended drying times between applications.

Idea 4: Ambient Low-Level Lighting Networks
How to Create
Proper illumination is the most critical factor in preventing a dark interior from feeling gloomy or uninviting. This lighting concept replaces bright overhead fixtures with a distributed network of low-level, warm-toned ambient light sources positioned at varying heights throughout the room. By relying on table lamps, floor fixtures, and wall sconces, you create distinct pockets of light and shadow that emphasize the cozy atmosphere of the space. The intention is to draw the eye to specific functional zones, such as a reading chair or a display shelf, while allowing corners to remain soft. This approach relies on warm-color temperature bulbs to enhance the inherent warmth of dark wall tones.
Step-by-Step Guide
Begin by mapping out the room to identify areas that require functional illumination, such as seating areas, desks, and reading nooks. Procure three to five distinct lighting fixtures, ensuring they utilize frosted or opaque shades that diffuse light softly rather than casting harsh glares. Equip every fixture with warm LED bulbs rated between 2200K and 2700K on the color temperature scale, keeping the wattage low to maintain a soft glow. Position a tall floor lamp behind a primary seating option, place matching table lamps on side tables, and install plug-in wall sconces on either side of central artwork. Hide all electrical cords behind furniture pieces or use paintable cord covers that match the wall color exactly to keep the lines clean. Utilize smart plugs or dimmers to connect the entire lighting network, allowing for effortless control over the overall brightness levels.

Idea 5: Dark Antiqued Botanical Galleries
How to Create
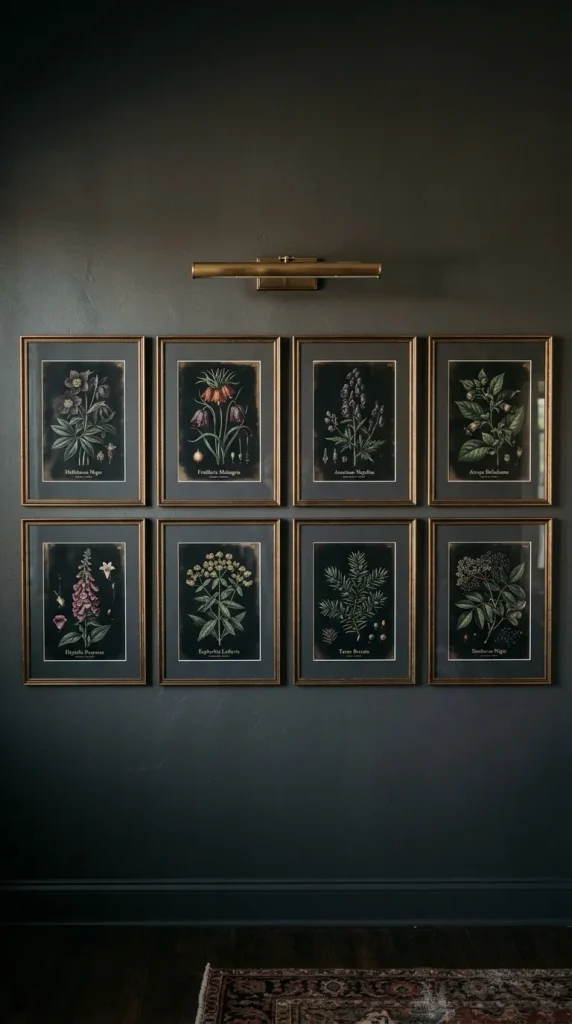
A dark botanical gallery wall introduces natural imagery into a structured interior while maintaining a rich, antique aesthetic. This concept uses a collection of vintage botanical illustrations featuring deep green foliage, dark flora, or nocturnal themes set against black or charcoal backdrops. Framing these prints in matching dark wood or distressed metallic frames creates a structured art installation that adds historical charm to the room. The contrast between the natural organic shapes of the plants and the linear structure of the frames creates a compelling visual dynamic on a dark wall. This approach allows decorators to introduce subtle organic colors without disrupting the overall deep color palette of the room.
Step-by-Step Guide
Source a cohesive set of six to eight high-resolution vintage botanical prints online or from old books, focusing on images with muted tones and dark backgrounds. Purchase identical frames that match the desired scale of the wall, opting for matte black timber or antiqued bronze finishes. Trim the prints carefully to fit the frames precisely, using black or dark gray matting boards instead of traditional white to maintain the deep color theme. Lay the framed prints out on the floor in front of the target wall to experiment with different grid layouts and spacing arrangements. Measure and mark the hanging points on the wall using a pencil, a leveling tool, and measuring tape to ensure perfect alignment. Install wall anchors or picture hooks at each marked location, then hang the frames systematically from the center outward, maintaining a consistent two-inch gap between each frame.
Idea 6: Rich Wood and Stained Shelving
How to Create
Integrating dark wood elements through open shelving units introduces structural warmth and natural grain textures into a deeply toned room. This concept focuses on replacing light or painted shelves with thick, solid wood planks stained in deep espresso, walnut, or ebony tones. The natural variations in the wood grain reflect light softly, breaking up flat wall surfaces without disrupting the color scheme. These shelves serve as an excellent organizational platform for showcasing curated objects, books, and handmade stoneware. By choosing deep wood tones, the shelving blends organically into dark walls, making the displayed items appear as if they are floating within the space.
Step-by-Step Guide
Purchase solid pine or oak planks cut to the desired length from a local hardware store, selecting boards that are at least one and a half inches thick for a substantial look. Sand the wooden planks thoroughly using progressively finer sandpaper grits, finishing with a 220-grit paper to create a perfectly smooth surface. Wipe away all sawdust with a tacky cloth, then apply a pre-wood wood conditioner to ensure even stain absorption. Apply a rich oil-based wood stain in an espresso or dark walnut shade using a clean rag, wiping in the direction of the wood grain. Allow the stain to sit for ten minutes before wiping away the excess, then let it dry completely for twenty-four hours. Seal the stained wood with a matte polyurethane topcoat to protect against moisture and scratches. Mount heavy-duty matte black iron brackets into the wall studs, then secure the stained shelves firmly on top using wood screws.

Idea 7: Textural Charcoal Bedding Layers
How to Create
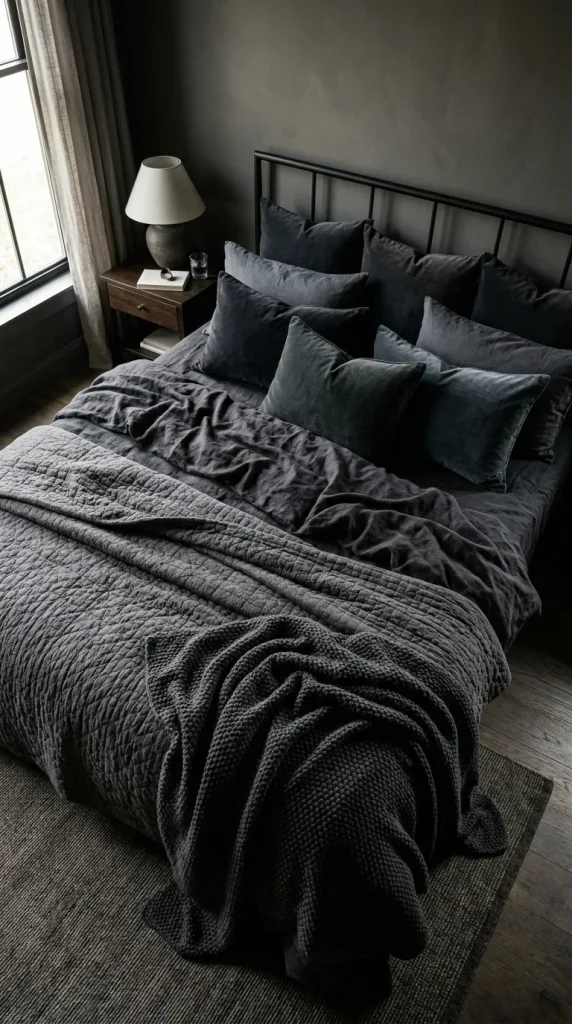
Transforming a bedroom into a cozy retreat relies heavily on the tactile quality of the textiles used on the central bed frame. This concept avoids flat, solid surfaces by layering multiple contrasting dark textiles, such as charcoal linen sheets, a quilted slate duvet, and a heavy knitted graphite throw blanket. The variation in textile weaves creates visual interest through shadows and depth, ensuring the dark bed looks inviting rather than flat. Using matte fabrics prevents unwanted light reflection, keeping the focus entirely on comfort and softness. This approach allows decorators to maintain a strict monochromatic palette while ensuring the bed remains the primary design feature of the room.
Step-by-Step Guide
Start by dressing the mattress in high-quality, washed linen or long-staple cotton sheets in a deep charcoal or asphalt gray tone. Layer a thick, down-filled comforter inside a matte finish duvet cover of a slightly different dark shade, such as smoky quartz or dark pewter, to introduce subtle contrast. Shake the duvet out completely and fold the top third down over the pillows to expose the layered sheets beneath. Place two large structural European pillow shams clad in dark velvet against the headboard to provide a soft vertical backing. Layer standard sleeping pillows in front, followed by two smaller accent cushions featuring a pronounced woven pattern or a waffle texture. Complete the arrangement by draping a chunky, heavy-knit throw blanket across the foot of the bed, allowing it to fall naturally over the edges to add movement.
Idea 8: The Metallic Accent Statement
How to Create
Introducing metallic elements into a dark interior design provides essential highlights that catch ambient light and prevent visual stagnation. This concept utilizes brushed brass, antiqued gold, or polished copper accents placed strategically against dark backdrops to create a sophisticated contrast. The warm tones of gold and brass harmonize beautifully with deep greens, blues, and blacks, elevating the overall design aesthetic. This method relies on using metallic finishes sparingly on small fixtures like cabinet hardware, light switches, picture frames, and decorative bowls. The reflective quality of the metal creates sharp focal points that cut through the deep surrounding tones, drawing attention to specific design details.
Step-by-Step Guide
Walk through the room and identify standard functional hardware that can be upgraded, such as drawer pulls, door handles, and switch plates. Purchase high-quality replacement hardware finished in brushed brass or antiqued gold, ensuring the dimensions match the existing screw holes perfectly. Use a manual screwdriver to remove the old utility hardware carefully, taking care not to scratch the surrounding painted surfaces. Clean the surface beneath the old hardware thoroughly before installing the new metallic pieces securely. Introduce additional metallic elements by selecting table lamps with brass stems or hanging mirrors framed in delicate gold metal bands. Position these reflective items directly in the path of your low-level lighting sources, ensuring the light bounces softly off the metallic surfaces to create a warm, inviting glow throughout the space.

Idea 9: Deep Geometric Accent Paneling
How to Create
Geometric wall paneling adds architectural structure and three-dimensional texture to flat walls, enhancing the complexity of dark spaces. This concept uses thin wooden battens arranged in modern geometric configurations across a wall surface before painting the entire structure a single dark tone. The raised edges of the woodwork create strong shadow lines that shift throughout the day as light moves across the room. This technique provides an effective way to update plain drywall in modern homes, introducing traditional craftsmanship through a clean design lens. The resulting pattern adds visual weight to the room, making it feel substantial, custom-built, and highly curated.
Step-by-Step Guide
Sketch your desired geometric pattern on paper first, opting for a modern asymmetrical grid or a classic floor-to-ceiling vertical board and batten design. Measure the wall dimensions carefully and calculate the exact length and number of wood battens required, choosing lightweight MDF or pine strips that are two inches wide. Use a pencil, a long straightedge, and a laser level to draw the pattern lines directly onto the wall surface as a precise placement guide. Cut the wooden battens to the required lengths using a miter saw, ensuring all joint angles are perfectly square. Apply heavy-duty construction adhesive to the back of each batten, press it firmly onto the marked wall line, and secure it permanently using a brad nailer. Fill all nail holes and joint seams with paintable wood filler, sand smooth once dry, and apply a premium primer. Paint the entire paneled wall structure with two coats of your chosen deep paint color.

Idea 10: Curated Dark Stoneware Displays
How to Create
Decorating surfaces with dark, artisanal objects reinforces the cohesive feel of an interior design scheme down to the smallest details. This concept relies on assembling groupings of matte black ceramic vases, dark clay pottery, charcoal stoneware, and volcanic rock sculptures on tabletops and shelves. By choosing objects with varied organic shapes and rough textures, you create an engaging display that feels curated over time. These dark decorative items absorb light differently than painted walls, introducing subtle tactile contrasts into the room. This styling method is highly effective for breaking up smooth surfaces on mantels, coffee tables, and sideboards, adding a layer of handmade sophistication.
Step-by-Step Guide
Collect a variety of ceramic and stoneware vessels in deep color tones, ensuring a mix of heights, shapes, and surface textures. Look for handmade pottery with visible grain, matte finishes, or rough, unglazed exteriors to maximize tactile interest. Select a prominent flat surface, such as a entryway console or a fireplace mantel, and clear it completely of all existing decorations. Begin the arrangement by placing the tallest stoneware vase slightly off-center to serve as the structural anchor for the display. Position two medium-sized vessels nearby, overlapping the edge of the tallest piece slightly to create visual depth and a sense of layered history. Group smaller items like dark stone bowls or charcoal candleholders at the base of the larger vessels to form a cohesive trio. Insert a few sprigs of dried eucalyptus or dark, preserved foliage into the main vase to complete the organic presentation.

Common Beginner Mistakes and How to Avoid Them
One of the most frequent errors made by beginners entering dark home decor is failing to account for the impact of paint finishes on light absorption. Selecting a high-gloss or semi-gloss paint for a dark room results in harsh glares and highlights every wall imperfection, completely disrupting the intended soothing atmosphere. To prevent this issue, always opt for flat, matte, or eggshell finishes on large wall surfaces, as these textures diffuse light evenly and create a velvet-like appearance. Another common pitfall is relying on a single, central overhead light source, which casts deep, unflattering shadows down the walls and makes the space feel confined. Avoid this mistake by turning off central fixtures and instead building a layered lighting system using lamps, sconces, and accent lights placed at eye level. Additionally, decorators often forget to introduce sufficient textural contrast, resulting in a room that looks flat and monotonous. Prevent this by ensuring that every dark surface features a unique tactile quality, mixing smooth matte walls with heavy woven fabrics, grained wood, and rough stoneware.
Practical Tips for Better Results
Achieving professional results with deep interior design requires attention to small details that elevate the overall execution of the project. Always test paint samples on multiple walls within the target room before committing to a final color selection. Observe how the dark paint samples look during the morning, afternoon, and under artificial lighting at night, as deep tones shift dramatically based on light exposure. When painting adjacent trim pieces or doors, invest in high-quality synthetic filament brushes that minimize visible brush marks, ensuring a perfectly smooth transition between surfaces. If you are decorating a small room, use large mirrors framed in dark metals to help bounce ambient light across the space without compromising the color scheme. Incorporate natural elements such as deep green live plants like snake plants or rubber trees; their glossy, organic leaves naturally complement dark walls and introduce life into the design. Finally, maintain a strict editing eye, ensuring that every piece of furniture or decor added to the room serves a clear aesthetic or functional purpose.
Styling, Presentation, or Organization Ideas
Styling an interior with a dark color scheme requires an organized approach to furniture arrangement and decor placement to maintain a balanced look. Group furniture pieces close together to form intimate conversation zones, anchoring the arrangement with a large, low-profile area rug in a complementary dark tone. When organizing shelves or display surfaces against dark backdrops, use the rule of threes to create visually balanced compositions that prevent clutter. Leave ample open space on walls and surfaces to allow the deep background color to show through, which creates a sense of luxury and breathing room. Group books by cover color, choosing volumes with dark or neutral spines to maintain the clean lines of the room layout. Use hidden organizational storage solutions like dark woven baskets or black leather boxes to keep daily essentials out of sight, ensuring that only curated, intentional decorative items remain on display. This disciplined organization ensures that the dramatic atmosphere remains sophisticated, structured, and entirely free of chaotic visual clutter.
Budget or Time Planning
Executing an interior redesign efficiently requires a realistic breakdown of financial resources and time management. A single-wall painting project can comfortably be completed over a single weekend, allowing ample time for surface preparation, drying, and cleanup. Comprehensive room transformations involving geometric paneling and molding updates should be planned across two to three weekends to prevent fatigue and rushed work. To keep expenses low, focus on high-impact projects like DIY painting and hardware replacement, which deliver significant visual changes for a relatively low financial investment. Thrift stores and secondhand markets are excellent sources for finding vintage frames, unique furniture pieces, and glassware that can be updated with dark wood stains or matte black spray paint. Create a structured project checklist detailing every phase of construction, from the initial cleaning and sanding to the final placement of accent lighting. Allocating your budget primarily toward high-quality matte paint and proper lighting fixtures ensures the foundation of your design is built to last.
Creative Expansion and Advanced Inspiration
Once the foundational principles of dark interior styling are mastered, creators can confidently explore advanced design techniques to expand their projects. Consider upgrading plain ceilings by applying a deep color tone or installing dark wood tongue-and-groove paneling to create an encompassing canopy effect. Another advanced avenue involves integrating hidden LED strip lighting into architectural features, such as behind crown molding or beneath floating shelves, to cast a modern wash of light down dark surfaces. Homeowners can also explore mixing deep textures at a larger scale, such as installing a charcoal Venetian plaster wall or applying dark, patterned wallpaper with subtle metallic filigree. Integrating custom-built dark cabinetry or floor-to-ceiling library shelving provides a dramatic structural upgrade that increases both storage and architectural value. These advanced concepts allow decorators to evolve their spaces over time, transforming basic interior styling into a highly customized, luxurious architectural statement that showcases a deep understanding of modern design.