10 Dreamy DIY Ambient Cloud Lamp Crafts

Soft interior illumination plays a foundational role in modern home decor, with cloud-inspired lighting concepts becoming a standout choice across major design channels. Creating handmade atmospheric light fixtures allows homeowners to convert raw materials into functional, sculpted art pieces that diffuse light evenly throughout living spaces. In this comprehensive step by step tutorial, readers will learn ten distinct techniques for constructing customized ambient cloud lamp installations using simple crafts and accessible supplies. Mastering these decorative lighting projects provides clear methods for improving personal bedroom setups, nursery interiors, and peaceful reading corners without requiring specialized electrical expertise. Exploring these creative ideas offers high practical value by guiding beginners through structural assembly, wire management, and proper diffusion placement to achieve a refined, professional finish inside any modern room layout.
Why This Idea Is Trending or Useful
Cloud light installations continue to capture interest on digital inspiration platforms because they merge functional room lighting with organic visual art. From a practical standpoint, these fixtures act as ambient light diffusers that soften harsh bulb glare, creating a relaxing home environment suitable for evening rest. The rising popularity of personalized bedroom aesthetics has amplified the demand for affordable budget ideas that offer high visual impact without expensive contractor fees. As a beginner friendly creative project, crafting a customized cloud lamp provides an approachable entry into hands-on interior decoration without complex power tools. The inherent flexibility of fiberfill, paper bases, and low-voltage LED systems enables individuals to adjust the size, density, and color output of their light sources. Consequently, these trending ideas seamlessly complement minimalist style apartments, playful children rooms, and soothing home office setups alike.
Materials and Preparation
Building a durable ambient cloud lamp requires gathering reliable structural materials and completing essential surface preparation before beginning assembly. Foundational items include flame-retardant synthetic polyester fiberfill, lightweight paper lantern spheres, clear plastic globe bases, matte acrylic paint, and low-voltage LED lighting kits with cool-touch bulbs. Required tools consist of high-tack spray adhesive, dual-temperature hot glue guns with extra glue sticks, non-damaging ceiling hooks, clear nylon line, and protective table covers. Prior to starting your DIY construction, clean all plastic or paper surfaces thoroughly to eliminate dust that could weaken adhesive bonds. Uncoil LED light strands completely to verify uniform bulb functionality and plan cord routing toward nearby electrical outlets. Mapping out your fixture dimensions and organizing essential materials beforehand guarantees a smooth workflow, helping maintain precise structural control throughout the entire crafting process.
MAIN IDEAS SECTION
Suspended Dual-Core Lantern Cloud Pendant Light
How to Create
Constructing a suspended dual-core cloud pendant involves joining two lightweight paper lantern bases to form an elongated sculptural lighting foundation. Begin by hot-gluing two white paper lanterns of differing diameters together at their outer wire rims to establish an asymmetrical base shape. Thread an addressable cool-touch LED puck light or socket cord inside each lantern core, securing the power wires to the top suspension hooks with clear cable ties. Apply high-tack craft adhesive across the exterior paper surfaces, pressing small, teased tufts of flame-retardant polyester fiberfill onto the frame until the rigid circular outlines are completely hidden. Vary the density of the fiberfill around the edges, keeping the material lighter near the bottom to allow optimal light output down toward floor surfaces. Suspend the finished pendant fixture from a sturdy ceiling anchor using transparent nylon fishing line to create a weightless floating illusion.

Wall-Mounted Backlit Wooden Silhouette Cloud Sconce
Step-by-Step Guide
Creating a backlit cloud wall sconce relies on combining clean structural wood cutting with indirect background lighting for a crisp graphic display. Trace a large, multi-arced cloud outline onto a sheet of quarter-inch birch plywood, then carefully cut along the traced path using a hand jigsaw. Sand all cut edges smooth with fine-grit sandpaper before applying two coats of matte warm white or pastel acrylic paint to the front surface. Attach two-inch wooden spacer blocks behind the panel center, fixing a flexible warm white LED light strip along the inner perimeter channel facing back toward the wall. Secure non-damaging hanging hardware onto the spacer blocks and mount the fixture onto your selected feature wall area. When powered, the concealed LED strip bounces indirect light off the drywall behind the panel, creating a halo outline that highlights the smooth wood silhouette.
You Might Also Like


Tabletop Glass Dome Micro Fiberfill Storm Cloud
Setup Method
Building a tabletop storm cloud display within a glass dome container provides an enclosed decorative accent suitable for desks and nightstands. Select a clear glass cloche featuring a wooden base pedestal, painting the raw wood bottom in a neutral charcoal gray or matte black tone. Construct a central interior core by wrapping thin silver copper wire fairy lights around a compact foam ball mounted on a short central support rod. Tease small sections of synthetic fiberfill apart, applying light coats of spray adhesive to attach the fiber to the foam core until a full cloud form develops. Lightly brush subtle gray chalk dust onto the lower contours of the fiberfill to mimic natural storm cloud shading before lowering the glass cloche over the assembly. The glass enclosure keeps dust off the delicate fiber fill, delivering a clean, self-contained atmospheric accent piece for modern spaces.
Recessed Ceiling Box with Edge-Lit Fiber Cloud Matrix
Execution Process
Constructing a recessed ceiling box fixture introduces structured architectural depth while generating expansive overhead ambient illumination across the entire room. Build a shallow four-sided wooden frame box using lightweight poplar boards, painting the interior back face in a deep twilight blue hue. Mount addressable RGB LED light strips around the inside perimeter channel of the frame, directing the diodes inward toward the painted back panel. Secure a thin wire mesh grid across the open front face of the box, adhering small, airy clusters of synthetic fiberfill directly onto the mesh using hot glue. Mount the complete framed assembly flush against the ceiling surface, concealing power cords behind decorative white molding trim around the frame edges. The combination of edge-lit RGB diodes and fiberfill creates a soft lighting field that simulates natural atmospheric skies directly overhead.
Floating Geometric Acrylic Panel Cloud Lamp
How to Make
Designing an acrylic cloud lamp combines modern industrial materials with soft light diffusion to yield a sharp, gallery-inspired interior feature. Cut three sheets of clear cast acrylic into organic cloud outlines of decreasing sizes, drilling small suspension holes through the top corners of each panel. Sand the front face of each acrylic cutout with fine sandpaper to create a frosted finish that catches and scatters light effectively. Space the panels two inches apart using small metallic standoff hardware, threading a continuous strand of cool-touch micro LED lights along the interior separation gaps. Attach clear nylon cord through the upper mounting holes, hanging the multi-layered assembly directly in front of an interior window or accent wall. When illuminated, the frosted acrylic surfaces glow uniformly while maintaining crisp structural outer edges, making this handmade installation an ideal fit for modern minimalist style interiors.
Standing Paper Shade Tripod Floor Lamp Transformation
Installation Process
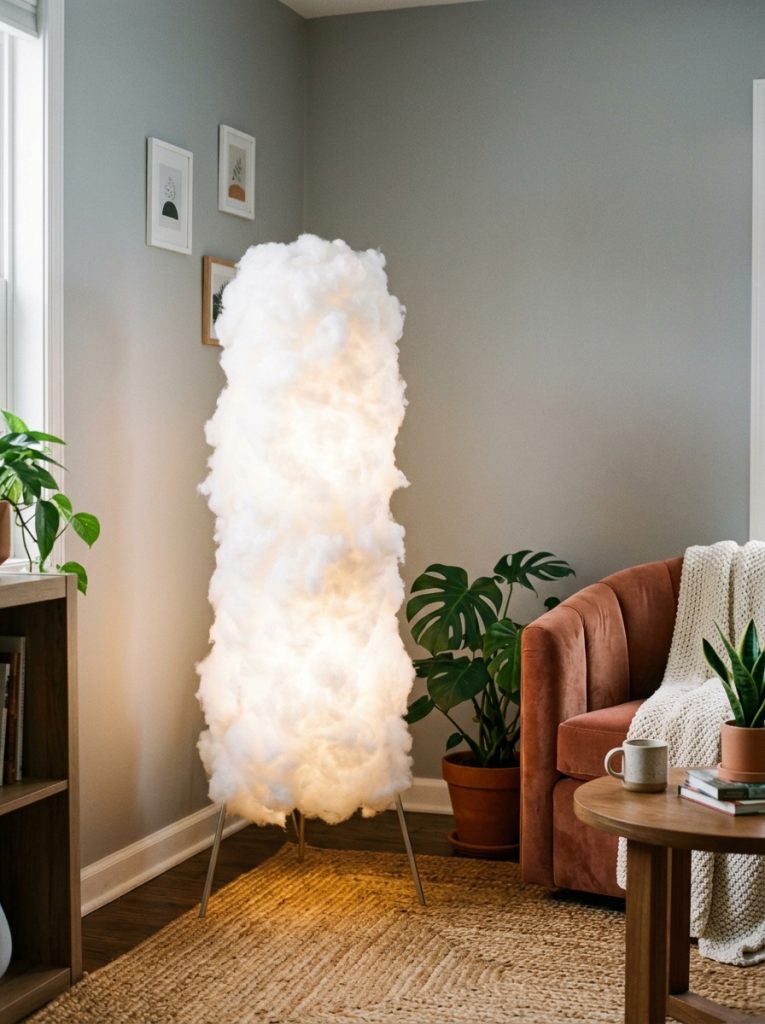
Transforming a standard paper shade floor lamp into an ambient cloud pillar provides an upright lighting solution without requiring ceiling mounts. Acquire a basic tall tripod floor lamp featuring a cylindrical or spherical white paper lampshade over a central socket assembly. Inspect the fixture to verify that cool-touch LED bulbs are installed, preventing heat buildup within the surrounding decorative materials. Working from the base of the shade upward, apply spray adhesive in small sections and press generous handfuls of teased polyester fiberfill firmly onto the paper backing. Sculpt the outer surfaces continuously, pulling loose fibers outward to form soft, organic billows that break up the rigid cylindrical profile of the original shade. This self-standing floor lamp modification provides bright, highly diffused ambient light across large bedroom or living room corners while keeping electrical components fully enclosed.
You Might Also Like



Hanging Resin Droplet Cloud Light Fixture
Step-by-Step Styling
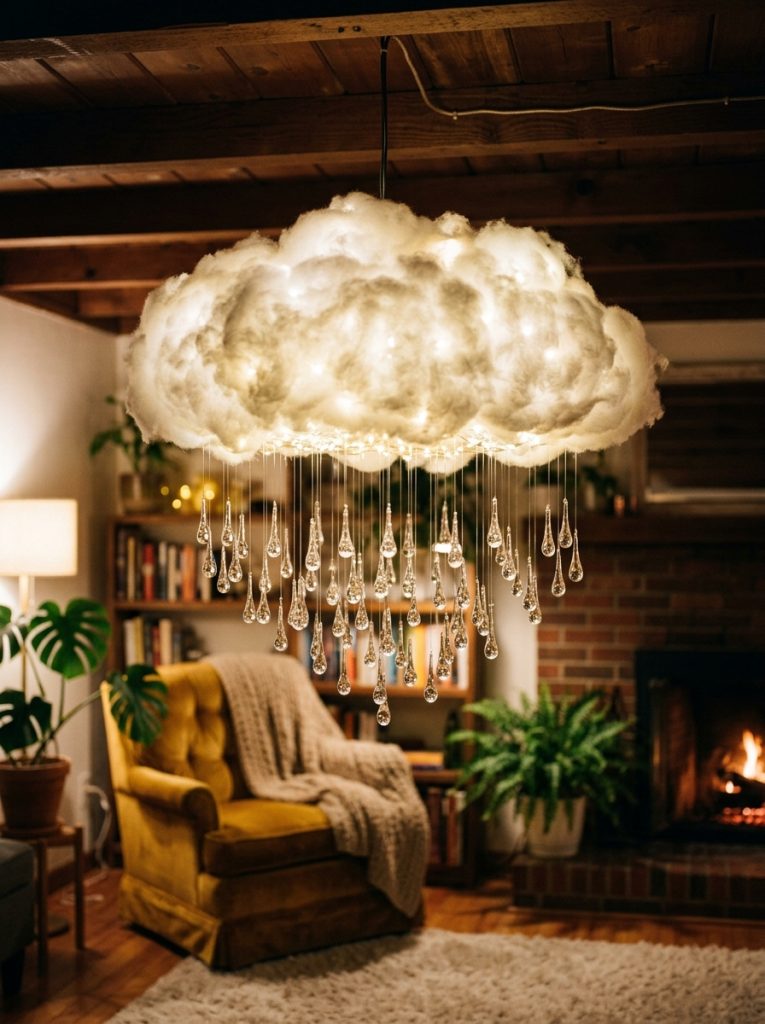
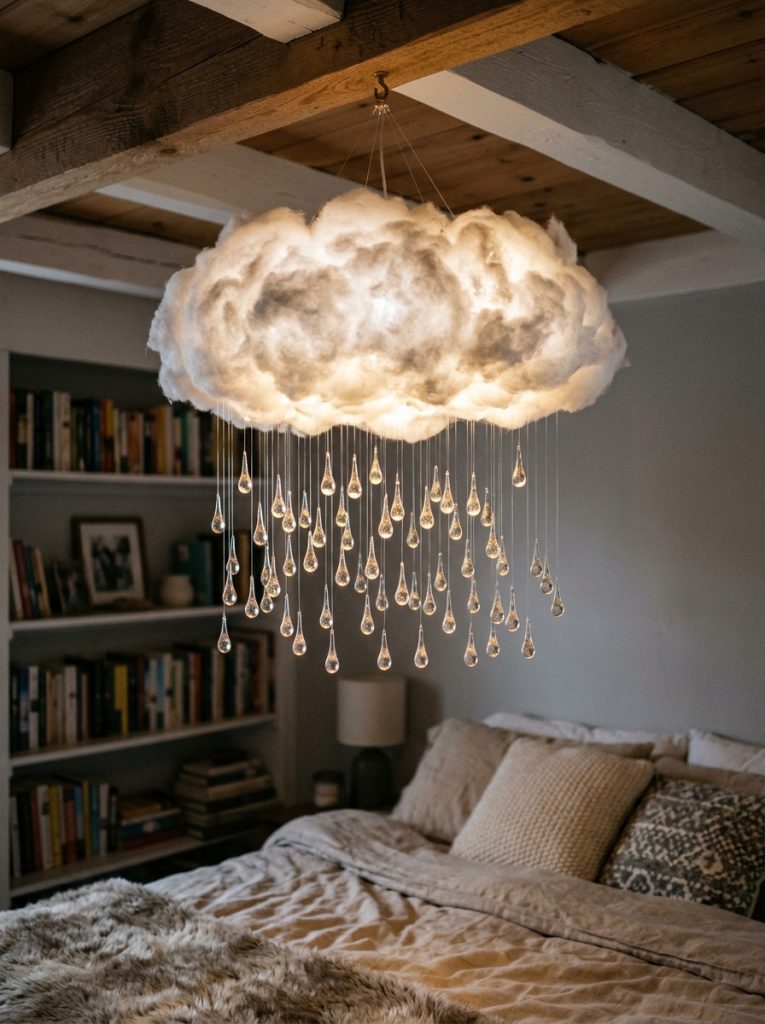
Combining clear cast resin elements with soft fiber cloud structures produces a detailed light fixture that captures the appearance of falling rain. Cast ten to fifteen small teardrop shapes using clear epoxy resin in silicone molds, embedding thin nylon lines into the top tips before the resin cures completely. Build a standard fiberfill cloud body over a spherical paper lantern base equipped with a central LED bulb socket following foundational craft steps. Attach the opposite ends of the clear resin lines to the bottom wire framework of the lantern, allowing the resin droplets to suspend at varied lengths below the cloud mass. Position warm LED micro lights near the attachment points so light travels down the clear lines, illuminating the resin teardrops from above. This detailed fixture offers dynamic visual movement, acting as a functional overhead light source and conversation piece.

Bent Wire Sculpture Cloud Wall Mount with Wrapped Neon Flex
Setup Procedure
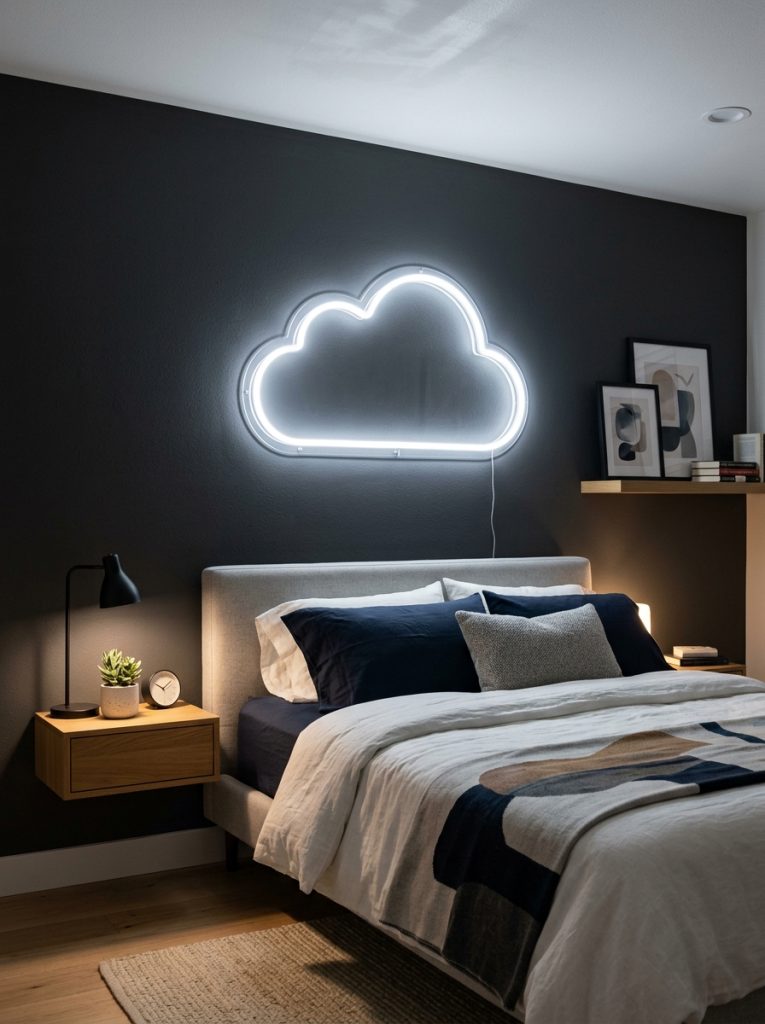
Crafting an illuminated wire outline cloud wall mount yields an ultra-modern aesthetic that delivers bright perimeter lighting with minimal physical depth. Bend a length of sturdy aluminum craft wire into a continuous multi-lobed cloud outline using basic needle-nose pliers to form smooth curves. Attach a flexible silicone LED neon tube light along the wire outline using small clear zip ties cut flush at the locking heads. Fasten small offset wall brackets to the rear of the wire frame, mounting the assembly two inches away from the wall surface to permit even backlighting projection. Route the power cable neatly along the lower wire curve, covering the wire in color-matched white heat-shrink tubing for a clean professional appearance. When switched on, the flexible neon tube projects a continuous line of intense, diffused light that outlines the cloud contour crisply against the wall.

Upcycled Woven Basket Atmospheric Cloud Table Lamp
Execution Method
Upcycling an open-weave natural basket into a structured cloud table lamp yields an atmospheric decor accent rich in tactile contrast and warmth. Select a shallow, round woven rattan or sea-grass basket, painting the exterior wire and reed surfaces with a coat of matte white primer. Install a stable wooden lamp base equipped with a low-voltage LED socket inside the center of the basket bottom. Tease white synthetic fiberfill into dense, cloud-like puffs, gluing them across the outer basket rim and weave apertures using a low-temperature hot glue gun. Allow small amounts of fiberfill to penetrate through the basket weave inward, ensuring internal light passes through both the woven gaps and exterior fibers. Place the completed lamp on a low side table, where the internal bulb projects soft, dappled light patterns through the woven frame and surrounding fiber cloud mass.

Cascading Sheer Textile Cloud Canopy Feature
How to Execute
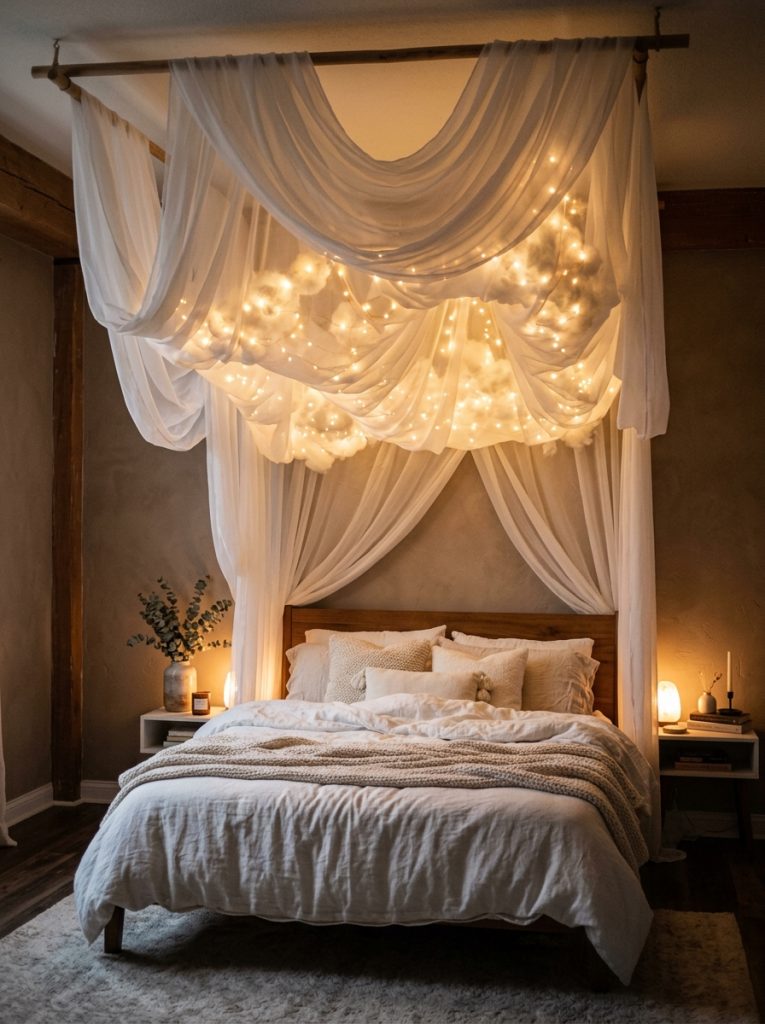
Creating an overhead textile cloud canopy utilizes long sweeps of sheer fabric to produce a soft, flowing sky installation above sleeping areas. Fasten two parallel wooden curtain rods to the ceiling, spacing them four feet apart to support hanging fabric billows. Drape long continuous lengths of white chiffon or organza fabric over the rods, allowing the material to dip gently between supports in deep, sweeping curves. Lay flexible copper wire LED fairy light strands across the top side of the suspended fabric, distributing the micro bulbs evenly across the canopy billows. Tuck lightweight handfuls of loose fiberfill along the interior fabric folds to build physical cloud shapes that conceal the individual wire strands from view below. The translucent fabric diffuses light across a broad ceiling surface, generating a soothing overhead atmosphere ideal for relaxation and nightly rest.
Common Beginner Mistakes and How to Avoid Them
Constructing handmade cloud lamp crafts presents specific technical challenges involving material density, heat management, and adhesive choice. A frequent error involves using high-wattage incandescent or halogen light bulbs within enclosed fiberfill structures, which generates excessive heat and creates severe fire hazards. Always verify that all light sources utilize cool-touch LED technology to guarantee operational safety over extended periods. Another common mistake is applying synthetic fiberfill in dense, heavy clumps directly over light sources, which smothers the output and leaves dark, muddy patches across the fixture surface. Tease all fiberfill apart into light, airy tufts before application, ensuring light passes through evenly without obstruction. Furthermore, using hot glue directly on paper lantern bases can cause paper tearing under the weight of heavy fiberfill; reinforce paper seams with clear packing tape prior to applying adhesives.
Practical Tips for Better Results
Achieving a refined, gallery-quality finish on DIY cloud lamps requires attention to light color selection, wire concealment, and surface maintenance. Choose LED lighting systems with adjustable color temperatures or smart app controls, allowing you to transition effortlessly from crisp daylight tones to warm amber hues during evening hours. Hide power cords, battery boxes, and hanging wires by running them along wall corners or inside color-matched cable raceways secured with removable adhesive strips. When applying fiberfill to spherical or box bases, build up material in thin, alternating layers to achieve organic, cloud-like shapes rather than rigid geometric forms. To maintain your cloud lamp over time, remove accumulated dust by using a hairdryer set strictly on the cool, low-speed setting held twelve inches away from the fiber surfaces. Regular gentle cleaning preserves maximum light diffusion and keeps the synthetic materials looking fresh indefinitely.
Styling, Presentation, or Organization Ideas
Integrating cloud lamp installations into an overall room design requires balancing lighting output with complementary furniture placement and color schemes. Position large suspended cloud pendants over central room features, such as platform bed frames, low coffee tables, or reading armchairs, to define distinct functional zones. Keep surrounding wall decor streamlined and uncluttered, utilizing neutral paint shades like soft ivory, slate gray, or muted blue to let the glowing fixture remain the primary visual focal point. For small spaces, combine tabletop glass dome cloud lamps with minimalist style wooden shelving to keep surfaces clean and organized. Route power cords neatly behind furniture legs using small adhesive cord clips, preventing tangled wires from distracting from the floating aesthetic. Pairing soft cloud lighting with natural wood textures, matte ceramics, and smooth textiles creates a harmonious environment that enhances overall home decoration.
Budget or Time Planning
Executing a DIY cloud lamp project efficiently requires straightforward resource planning and realistic time allocation. Basic cloud lamps built on paper lantern bases typically require two to three hours to assemble, making them an excellent single-afternoon creative project. Advanced installations, such as recessed ceiling boxes or multi-panel acrylic fixtures, may take six to eight hours spread over a weekend to allow paint and adhesives to cure completely. Keep project expenses minimal by purchasing synthetic polyester fiberfill in bulk craft boxes rather than small bags, and select multi-pack LED wire strands. Basic hanging cloud lamp setups utilizing paper lanterns, fiberfill, and LED lights can easily be completed on a modest budget under forty dollars. Pre-measuring your installation area, sketching structural plans, and organizing all required tools beforehand eliminates unexpected delays, ensuring a smooth, cost-effective crafting process from start to finish.
Creative Expansion and Advanced Inspiration
Once you master foundational cloud sculpting and lighting techniques, consider exploring advanced modifications to elevate your handmade light fixtures further. Integrate smart addressable RGB LED controllers programmed with dynamic lighting effects that simulate gentle lightning flashes, gradual sunrise transitions, or moving atmospheric color shifts. Experiment with embedding subtle scent diffusers or essential oil pads inside tabletop cloud lamps to combine ambient lighting with soothing aromatherapy. You can also incorporate natural dried botanicals, such as pale pampas grass or preserved baby breath, into the lower fringes of fiberfill clouds to introduce organic textural variety. Upgrading standard power sources to rechargeable battery packs allows for cord-free portability, enabling you to reposition your cloud lamps anywhere in your home. Continually testing new material combinations and lighting technology allows you to create truly unique home decor features that evolve with your personal style.

Visual inspiration, practical ideas and editorial stories for everyday living.
Leave a Comment