10 Minecraft Fountain Ideas Bedrock
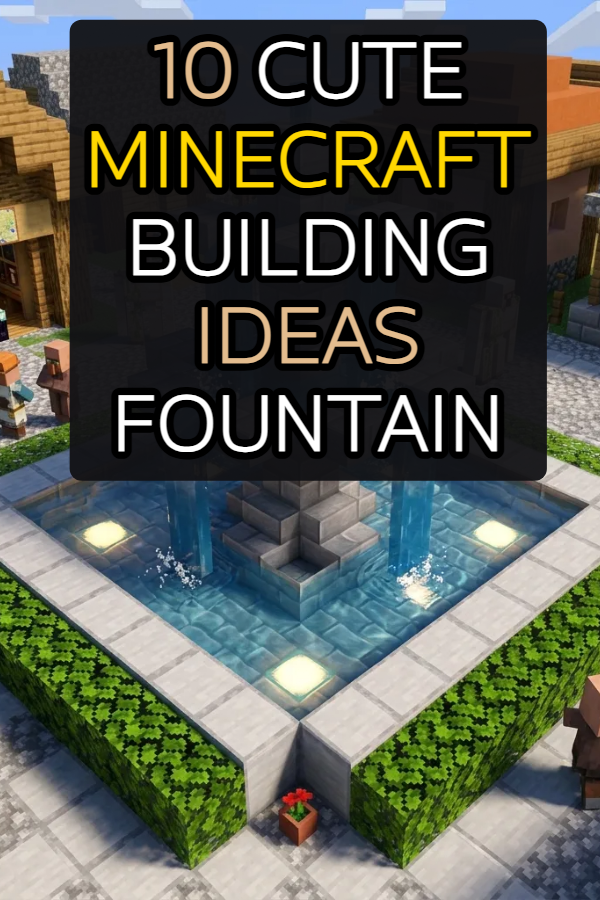
Building water features in Minecraft Bedrock Edition allows players to transform plain landscapes into visually appealing focal points for towns, gardens, and castle courtyards. Water mechanics in Bedrock Edition operate with specific fluid physics, making fountain construction both a creative and technical project. This comprehensive guide provides step-by-step instructions for constructing ten distinct water installations designed for survival and creative builds. Readers will learn how to select block palettes, manage fluid placement, integrate lighting, and apply structural detail to enhance their overall world design. Water structures add depth, texture, and movement to virtual spaces while serving practical roles as landmark indicators, farm water sources, or gathering hubs. By following structured methods, builders can create balanced, aesthetic installations that complement modern designs, rustic villages, or traditional castle spaces while keeping block gathering manageable.
Why This Idea Is Trending or Useful
Water features remain top trending ideas on Pinterest platforms due to their versatility and visual impact in world decoration. In modern Minecraft planning, a well-placed central feature anchors outdoor spaces, providing layout structure for surrounding pathways and gardens. The DIY appeal of building custom water features lies in their accessibility; players can assemble beginner friendly designs using basic stone, brick, or wooden materials gathered early in survival gameplay. Bedrock mechanics allow water blocks to flow across varying levels, creating dynamic sound and movement without requiring complex redstone wiring. Furthermore, incorporating water projects into neighborhood zones or village hubs enhances structural organization by dividing space logically. These builds offer high aesthetic value with low resource requirements, allowing players of all skill levels to practice scaling, symmetry, and material layering effectively within their builds.
Materials and Preparation
Before starting any construction creative project, gather necessary tools and plan the layout footprint on flat terrain. Essential items include iron buckets for water source placement, pickaxes, and building blocks such as polished diorite, deepslate, quartz, mossy cobble, sandstone, or prismarine. Scaffolding, wooden stairs, slabs, and light sources like lanterns, glowstone, or sea lanterns are necessary for structural balance and illumination. Mark out the ground foundation using colored wool or temporary dirt blocks to determine symmetry and spacing relative to nearby pathways or structures. Clear surrounding grass, trees, and debris to ensure clean sightlines. Plan your drainage channels and water flow routes ahead of time to avoid unintended flooding across nearby decorations. Having multiple water buckets ready allows players to construct infinite water sources near the build site, speeding up the placement process significantly.
Idea 1: Classic Tiered Stone Courtyard Fountain Step-by-Step Guide
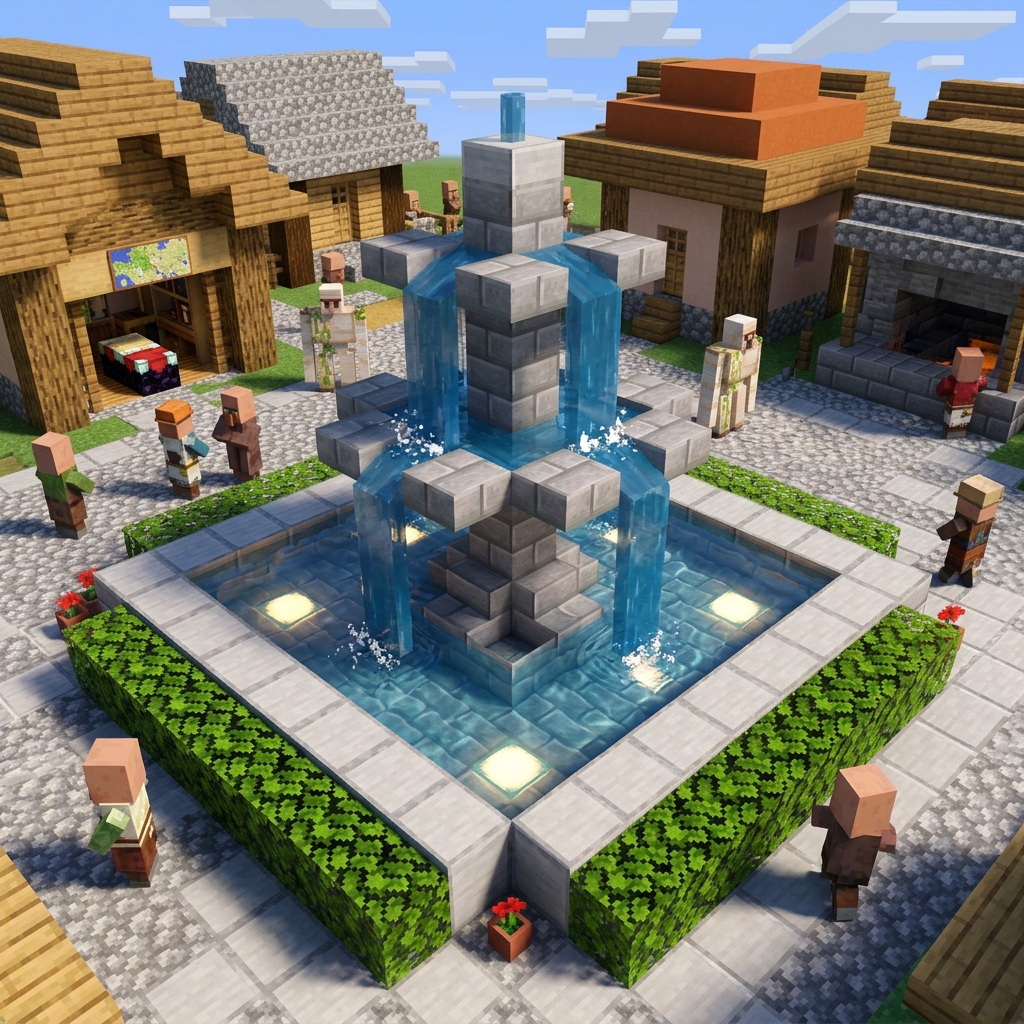
Constructing a traditional tiered stone structure creates a timeless central focus for town squares or village plazas. Begin by laying out a circular basin measuring nine by nine blocks using polished stone stairs and smooth stone slabs to contain the water pool cleanly. In the direct center of the basin, elevate a solid stone pillar five blocks high, adding outward-facing stone stairs at block levels three and five to form circular catching trays. Place a single water bucket source block on top of the central column, allowing fluid to cascade down over the upper tray into the lower basin. Decorate the surrounding basin wall with sea lanterns beneath stone slabs to create subtle underwater illumination during nighttime hours. Finish the build by adding leaf blocks along the outer edge of the floor to soften the stone textures and integrate the structure seamlessly into surrounding greenery.
Idea 2: Minimalist Quartz Pillar Water Feature How to Create
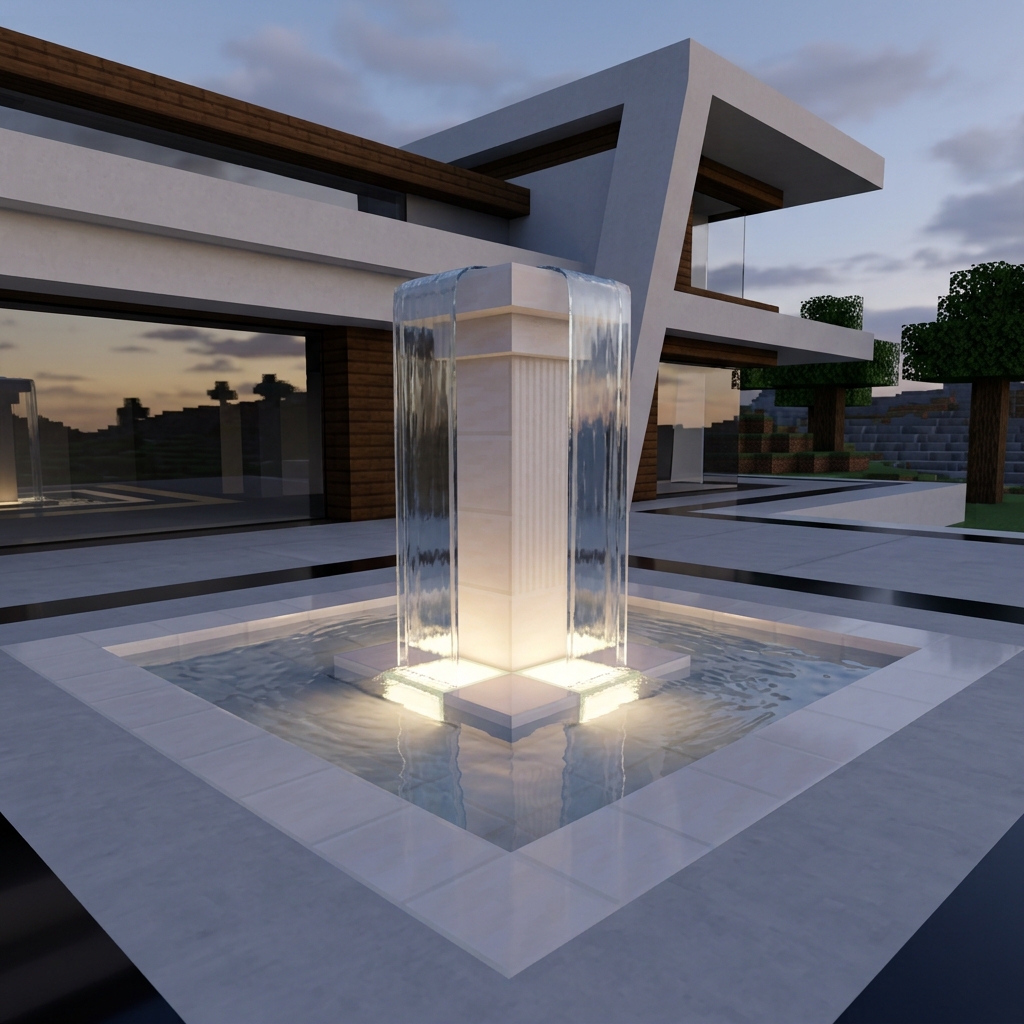
Modern aesthetic design often relies on sleek lines and clean geometric balance, making quartz an excellent material choice for modern builds. Construct a square five-by-five base frame using smooth quartz block and quartz slabs, leaving a shallow inner pool lined with light gray concrete blocks. Build a central vertical pillar using carved quartz blocks four blocks high, keeping the column slender to preserve a minimalist style profile. Position four water source blocks on each upper face of the top pillar block so the water falls evenly as a sheet around all four sides of the column into the basin floor below. Insert sea pickles or recessed glowstone beneath the quartz slabs to achieve hidden lighting that illuminates the falling water sheet uniformly without visible torches. This clean, modern design pairs well with contemporary bases, smooth concrete pathways, and structured glass housing projects.
Idea 3: Mossy Cobblestone Forest Garden Pond Setup Method
You Might Also Like


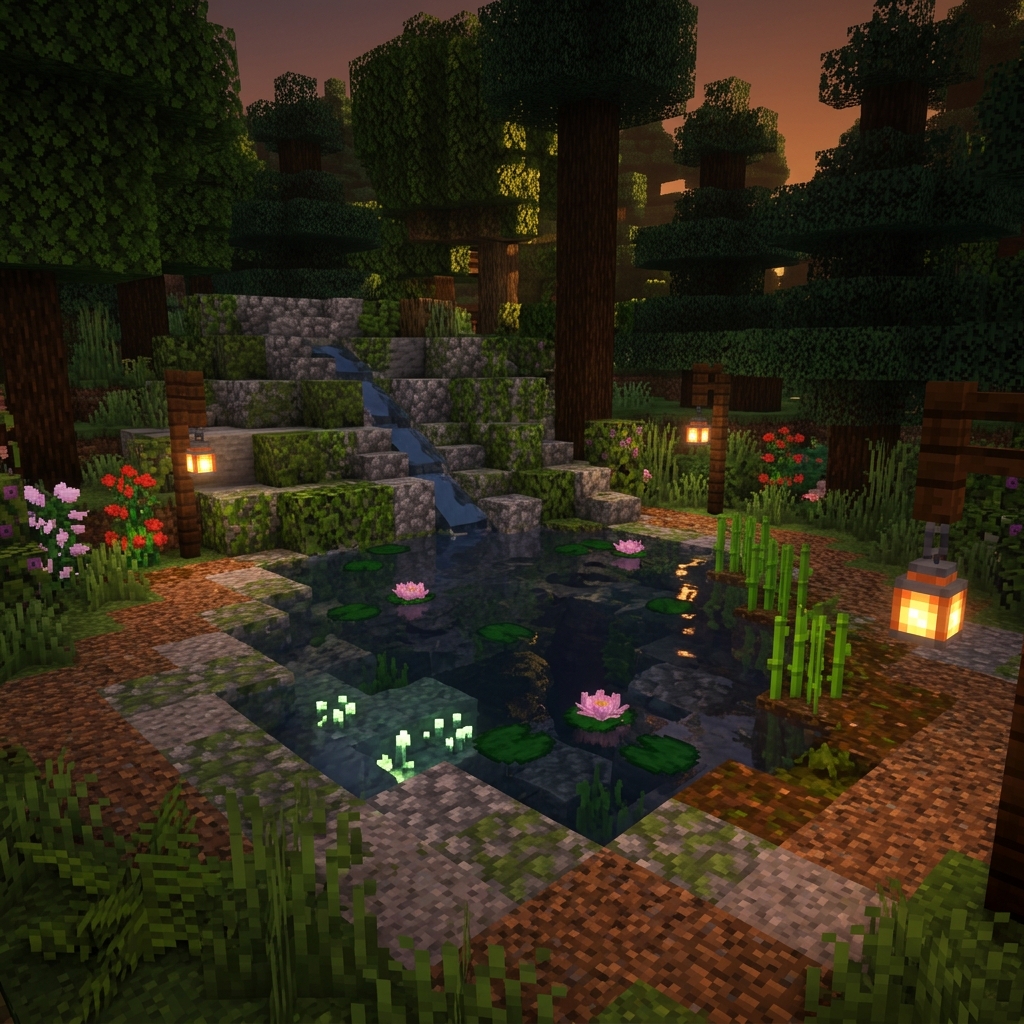
Integrating water features into natural biome environments requires an organic layout made from weathered, earthy materials. Form an asymmetrical basin perimeter using a mix of mossy cobblestone, standard cobble, and moss blocks to replicate natural erosion patterns along the water edge. Build a small rock outcrop near the rear of the basin using mossy cobblestone wall pieces and cobble slabs, standing roughly three to four blocks tall. Place water source blocks behind the top rock slab, guiding the stream down a terraced slope into the shallow pool below. Scatter lily pads, seagrass, and small sugar cane plants around the water perimeter, interspersing coarse dirt and root blocks for textured ground transitions. Add hanging lanterns from oak fence posts nearby to illuminate the mossy textures at night, resulting in an effortless DIY project ideal for woodland survival bases or natural garden spaces.
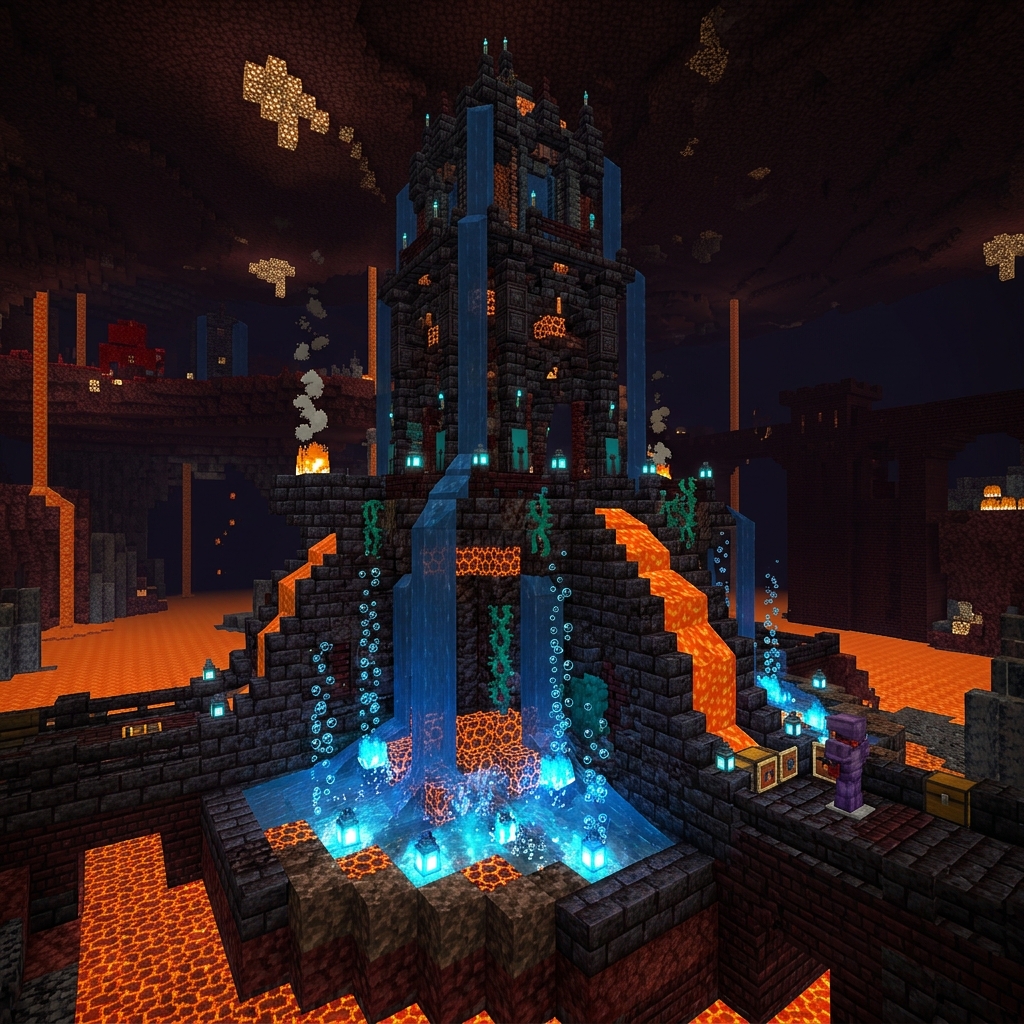
Idea 4: Nether Blackstone Lava and Water Tower Execution Process
Combining contrast materials creates striking visual appeal, making polished blackstone and nether bricks ideal for dramatic builds. Dig an eight-by-eight square foundation two blocks deep, lining the interior walls with polished blackstone bricks and floor slabs. Erect a central five-block tower featuring chiseled nether bricks, placing magma blocks at the base perimeter beneath the water layer to generate vertical bubble columns. Position water source blocks along the top edge of the blackstone pillar, letting the water flow down into the magma zones for animated aquatic movement. Install soul lanterns along the upper corners of the pillar frame to emit blue fire illumination across the dark stone surfaces. This high-contrast project introduces dynamic fluid animation into nether-themed bases or underground strongholds while maintaining structural safety and controlled flow boundaries across the surrounding floor space.
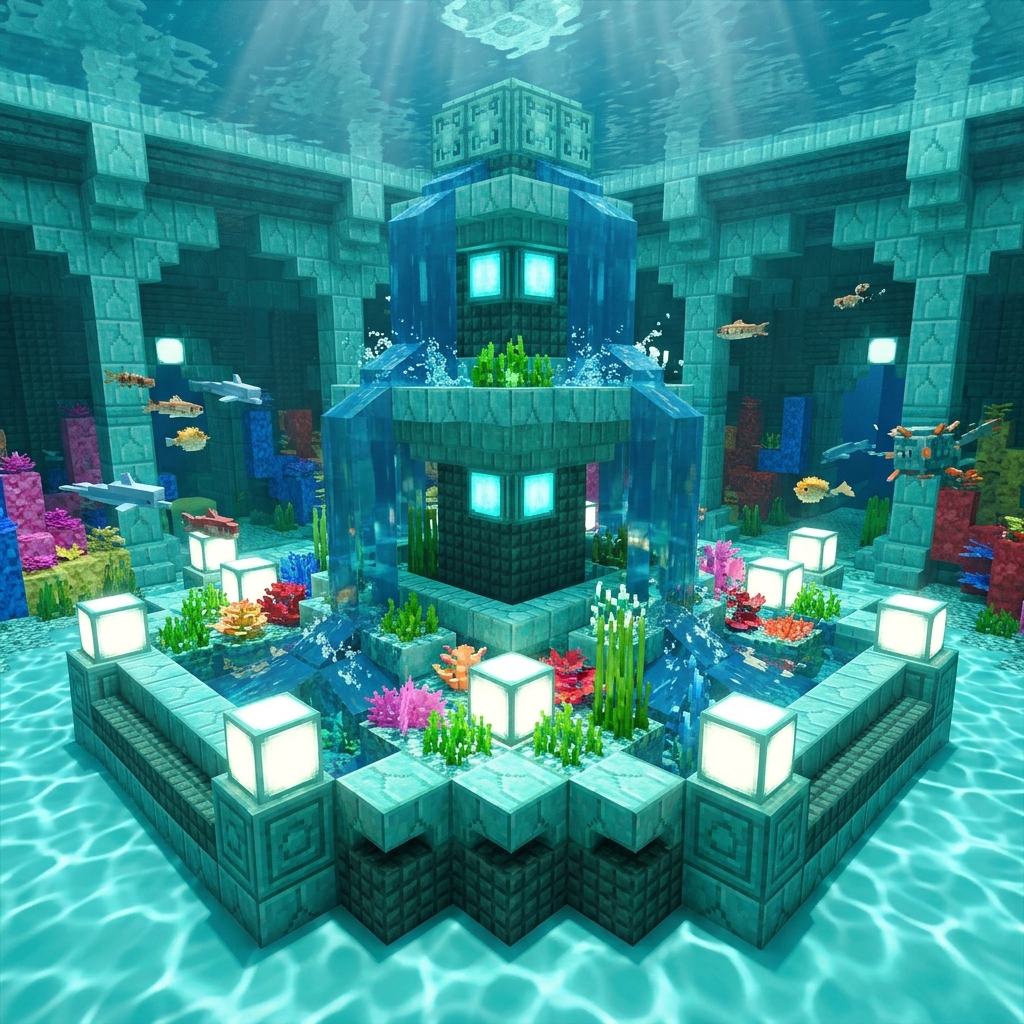
Idea 5: Prismarine Oceanic Temple Fountain How to Make
Designing an ocean-themed water feature brings vibrant cyan and turquoise tones to coastal or underwater bases. Construct an octagonal base rim using dark prismarine slabs and prismarine bricks, sinking the interior floor two blocks deep with sea lantern blocks set flush into the floor pattern. Raise a hollow center column six blocks high using chiseled prismarine, leaving internal space to run a vertical conduit or light core. Place water source blocks along the upper rim of the center pillar, allowing water to wrap around the textured teal blocks and overflow into the pool rim. Surround the bottom basin with potted kelp, sea pickles, and coral fan decorations to add organic movement beneath the water surface. The reflective properties of prismarine combined with underwater light sources create a bright aesthetic centerpiece suitable for island settlements or ocean monument conversions.
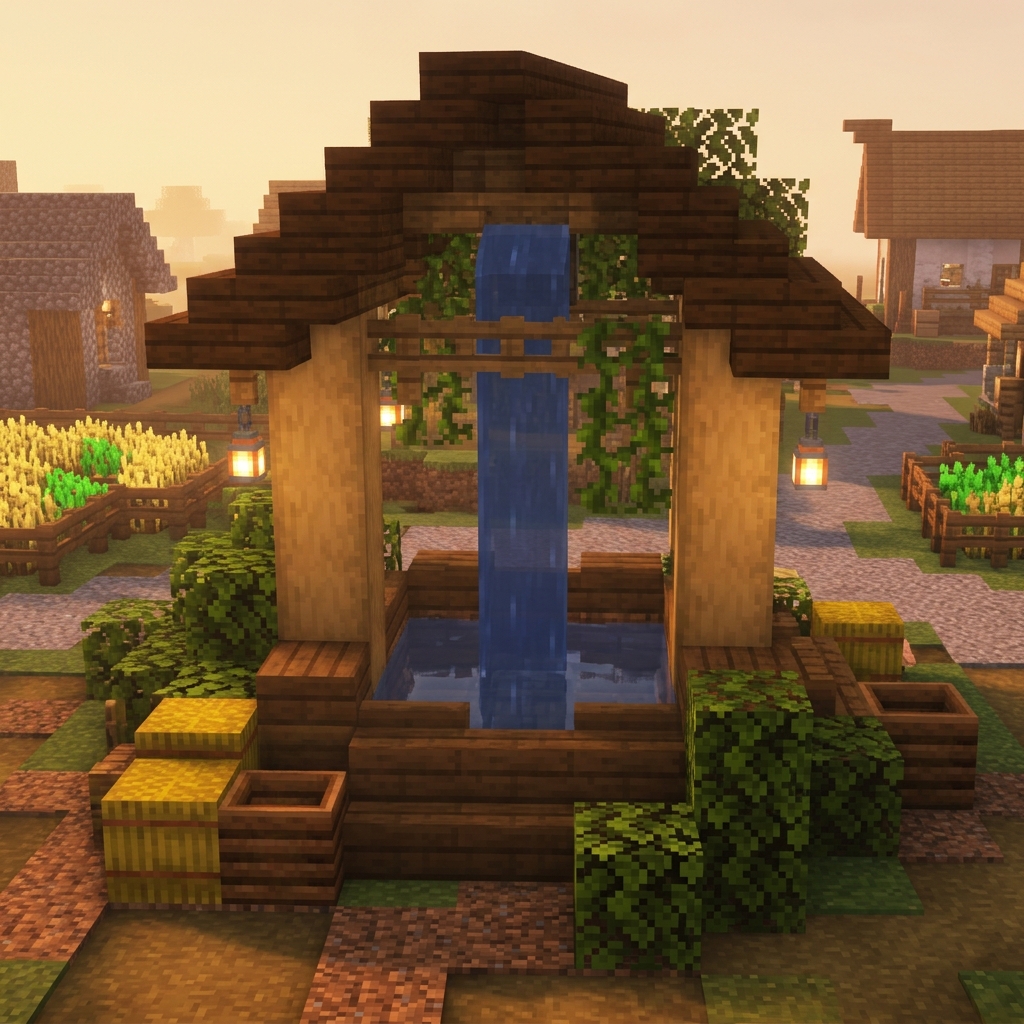
Idea 6: Rustic Wooden Barrel Waterfall Well Step-by-Step Guide
A farm-style water well design offers practical functionality and charming visual appeal for village agricultural centers. Lay out a five-by-five square ring using spruce wood stairs facing inward, filling the lower floor pit with dark oak planks. Build two three-block vertical posts on opposing sides of the ring using stripped spruce logs, spanning the top with spruce slabs and wooden trapdoors to form a protective timber roof frame. Hang a single water bucket visually using a chain block suspended from the central roof beam down toward the water surface level. Place a water source block within the top interior roof framing, allowing water to pour down through an open trapdoor into the center of the wooden well. Surround the ground outer wall with hay bales, composters, and oak leaf blocks to complete the cozy rural look within survival farming sectors.
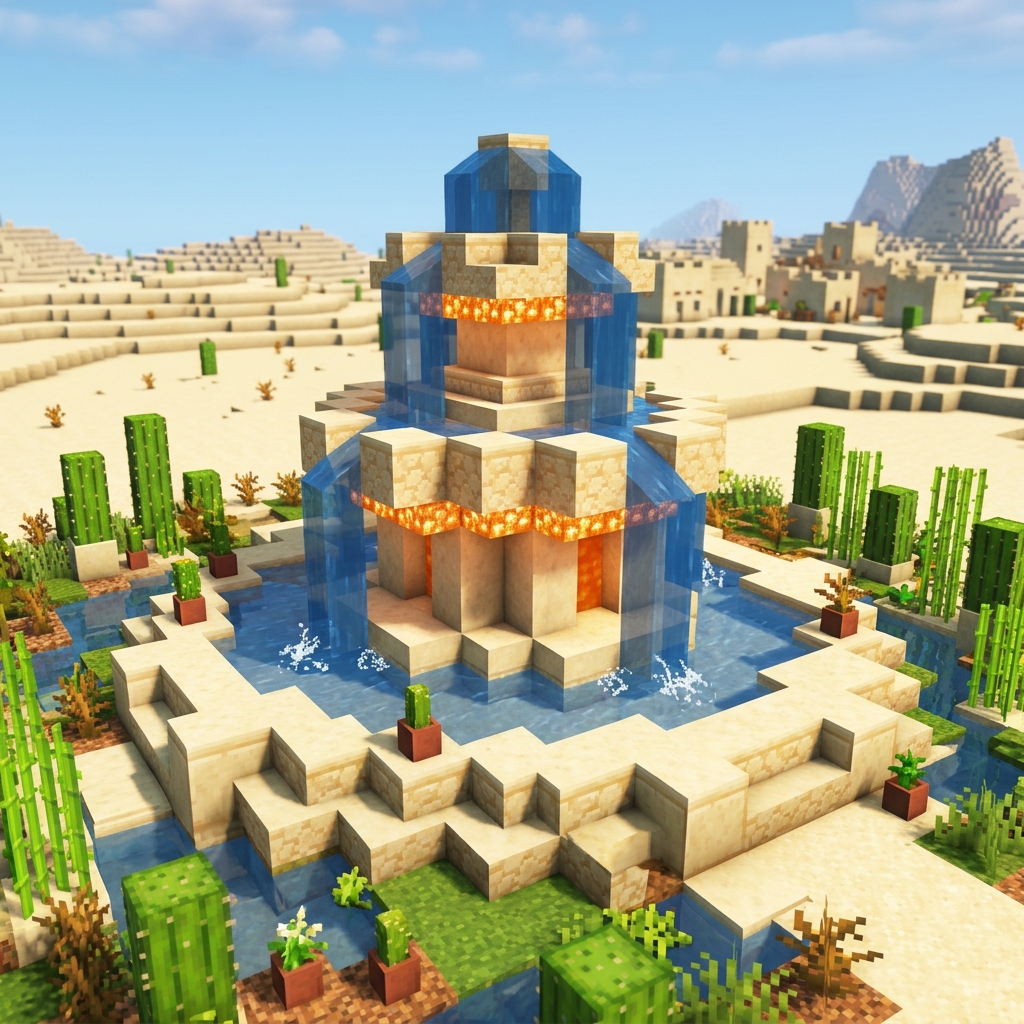
Idea 7: Desert Sandstone Oasis Cascade How to Create
Incorporating water into arid desert landscapes requires warm block textures like cut sandstone and terracotta. Build a terraced circular basin using smooth sandstone stairs, scaling the design across three stepped horizontal layers from ground level upward. Construct the central spire using chiseled sandstone blocks capped with cut red sandstone slabs to provide sharp color contrast against light sand terrain. Drop water source blocks from the highest tier, allowing fluid to spill over each stepped ledge down into lower catch basins in sequential waves. Plant cactus blocks, dead bushes in flower pots, and small patches of grass blocks with sugarcane around the outer dry border. Hide froglights or glowstone beneath sandstone stairs along the perimeter to emit warm amber light at dusk, creating a functional oasis aesthetic that fits naturally into desert village hubs.
Idea 8: Medieval Castle Square Water Monument Execution Process
You Might Also Like


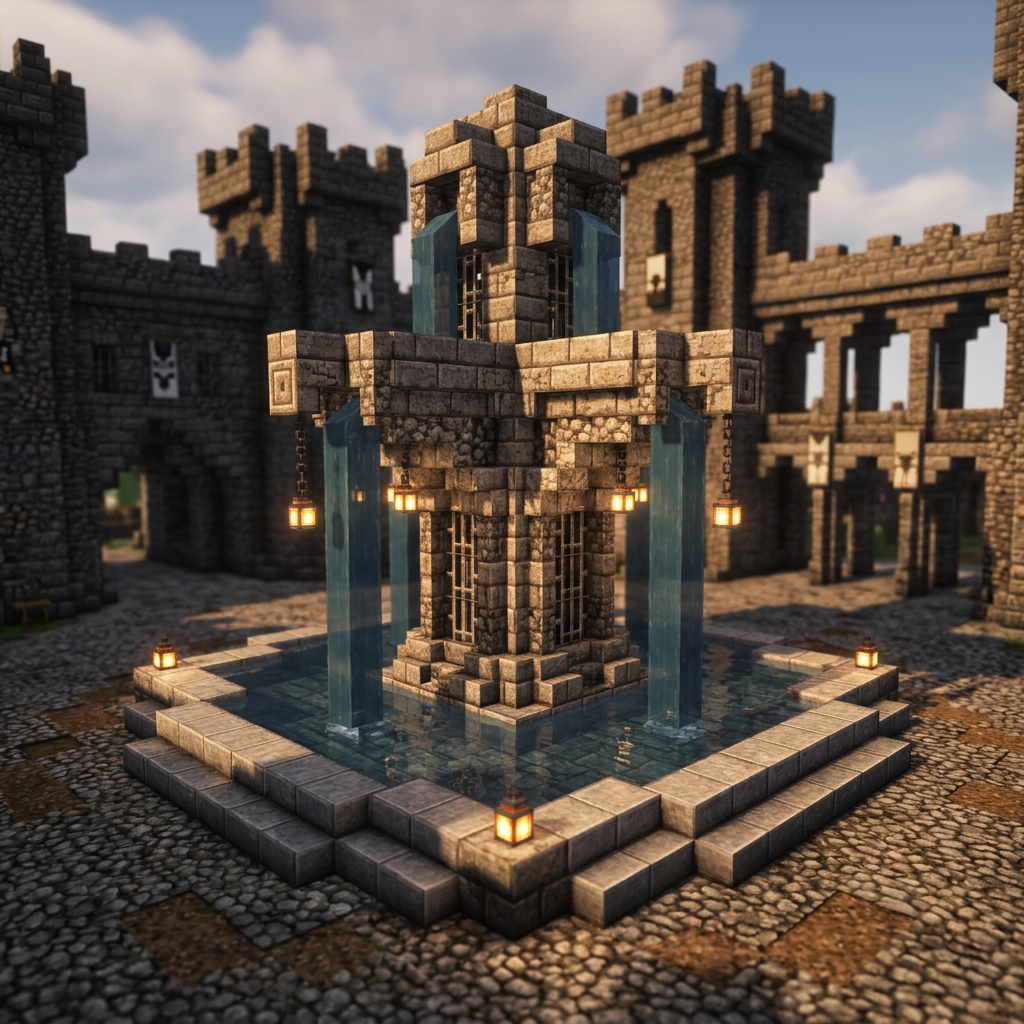
Grand fortress courtyards benefit from large scale, heavy stone architecture that matches surrounding defensive walls. Frame a wide eleven-by-eleven square outer boundary using stone brick stairs, cobblestone walls, and corner pillar supports crafted from stone brick walls. Raise a substantial centerpiece nine blocks high using cracked stone bricks, iron bars, and wall segments arranged in a symmetric cross profile. Position four water sources near the top cross arms, sending separate streams cascading down each face into distinct collection channels within the main basin pool. Mount metal lanterns onto iron bars along the main pillar to ensure visibility, while adding submerged jack-o-lanterns under stone stairs for subtle base lighting. The heavy proportion and classic material palette make this structured project suitable for medieval castles, keep entrances, or fortified trade strongholds requiring an authoritative central monument.
Idea 9: Deepslate Underground Cave Fountain Step-by-Step Guide
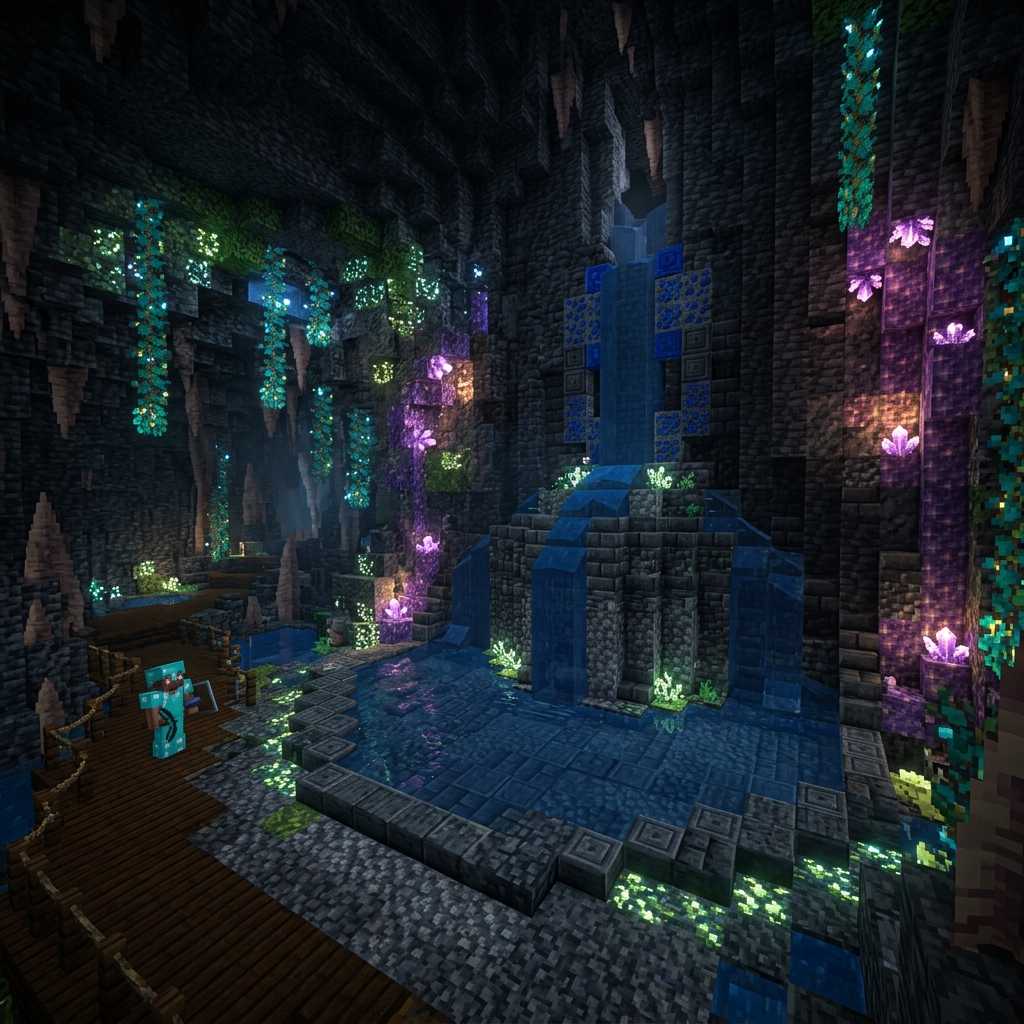
Underground base builds require dark, textured materials to match deep subterranean landscapes while incorporating controlled lighting. Construct a subterranean pool basin using cobbled deepslate and deepslate tiles arranged in an elongated oval shape along the cave floor. Build a naturalistic rock wall behind the pool using polished deepslate, deepslate bricks, and exposed lapis lazuli ore blocks for subtle blue highlights. Insert water source blocks into high crevices along the deepslate cave wall, letting water flow down natural ledge steps into the tile basin below. Decorate the surrounding cave walls with glow lichen, cave vines, and amethyst clusters to create atmospheric ambient illumination against the dark stone backdrop. This underground water feature provides accessible water bucket refilling points while converting cavernous basement rooms into detailed, comfortable living spaces within deep mining outposts.
Idea 10: Bamboo Garden Zen Water Spout Setup Method
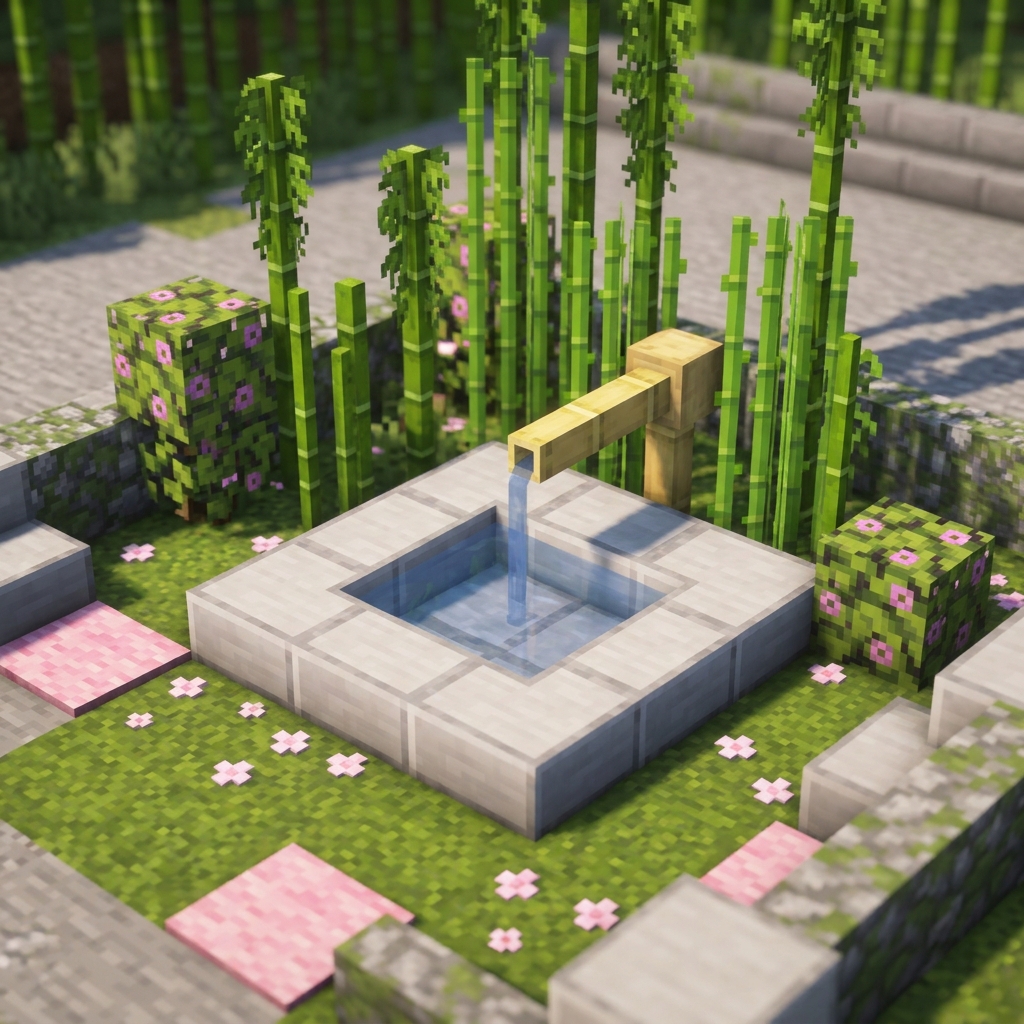
Tranquil garden spaces benefit from compact, subtle water installations that focus on natural material integration and spatial harmony. Construct a small three-by-three basin using smooth stone slabs surrounded by green moss carpets and exposed grass blocks. Place a vertical column of bamboo blocks two blocks tall alongside an angled stripped bamboo log pointing downward toward the central collection basin. Hide a single water source block within a trapdoor-enclosed pocket behind the bamboo beam, allowing a narrow water stream to trickles steadily into the shallow basin pool below. Surround the structure with tall bamboo plants, flowering azalea bushes, pink cherry leaves, and small pebble paths made of gravel and button blocks. This minimalist DIY project requires minimal space and material cost, making it an excellent decorative addition for residential gardens, courtyard corners, or quiet pathway intersections.
Common Beginner Mistakes and How to Avoid Them
When building water features in Bedrock Edition, common execution errors usually stem from improper fluid placement or incorrect block scaling. Placing water source blocks without creating sealed containment borders often leads to unintended flooding, destroying nearby redstone circuits, torches, or crop farms. To prevent unwanted water flow, always build complete basin perimeters using solid blocks, stairs, or slabs before releasing water sources. Another frequent mistake is misjudging structural proportions; building a fountain spire too tall for a small basin causes water to spill over outer rim walls onto surrounding pathways. Maintain balanced dimensions by ensuring the basin radius extends at least two blocks beyond the widest point of the falling water stream. Finally, failing to lit underwater floors allows hostile mobs to drown or spawn in dark pool corners, so integrate submerged light blocks like sea lanterns early in construction.
Practical Tips for Better Results
Achieving refined aesthetic results relies on thoughtful block variation, light placement, and depth management within the water basin. Layering different block variants—such as mixing smooth stone, stone bricks, and cobble within the same structure—adds visual texture and prevents designs from looking flat or repetitive. Utilizing stairs and slabs for basin walls allows builders to create waterlogged blocks, which hold water flush against structural edges while maintaining precise fluid boundaries. Submerging hidden light sources, such as sea pickles, glowstone, or froglights, beneath glass or waterlogged slabs creates a soft ambient glow that highlights water movement during night cycles. Additionally, incorporating aquatic plants like lily pads, sea grass, or coral fans introduces vibrant color and natural animation to static water pools. Testing water flow paths in a creative world beforehand saves time during survival assembly.
Styling, Presentation, or Organization Ideas
Integrating water features into surrounding base layouts requires clean pathway planning and intentional landscaping choices. Surround central fountain structures with symmetrical walking paths built from stone bricks, gravel, or wood planks to create organized traffic flow through village squares or garden spaces. Use flower beds, leaf hedges, and decorative fencing around the outer basin perimeter to anchor the build visually within the environment. For larger city designs, construct matching mini-fountains at major pathway intersections to establish a cohesive architectural style across the entire base region. Placing decorative seating using wooden stairs, signs, and trapdoors near pool edges transforms functional water spots into detailed social gathering hubs. Proper spatial organization ensures that decorative installations enhance overall base navigation rather than cluttering open building areas.
Budget or Time Planning
Executing building projects efficiently in survival mode requires basic resource management and time management strategies. Simple designs made from stone variants, cobble, or wood can be completed within fifteen to thirty minutes once materials are collected. Advanced builds utilizing quartz, deepslate, or prismarine require additional gathering time for smelting or mining, extending total project planning over several play sessions. Prepare materials in organized storage chests near the construction site prior to building to prevent unnecessary trips back to main base storage. Utilizing infinite water sources nearby accelerates the process of filling large basins, as players can refill buckets instantly without walking to distant natural water bodies. By selecting a design scale that aligns with your current inventory resources, you ensure steady project progress without stalling construction due to missing supplies.
Creative Expansion and Advanced Inspiration
Once basic water structures are complete, builders can expand installations by incorporating automated redstone mechanics or sound features. Integrating dispenser blocks connected to simple clock circuits allows players to toggle water streams on and off, creating dynamic water shows for major city centers. Advanced builders can line basin floors with note blocks triggered by underground redstone loops, playing customized ambient chimes in rhythm with water toggling. Expanding single water structures into multi-tiered canal systems connects multiple base areas with flowing transportation channels suitable for boat travel or item delivery. Combining lava streams enclosed in glass alongside falling water curtains creates high-tech visual contrast for modern industrial bases. These creative expansions allow simple water projects to evolve into functional, interactive engineering achievements across long-term Minecraft worlds.

Visual inspiration, practical ideas and editorial stories for everyday living.
Leave a Comment